billydpowell
-
Posts
1,652 -
Joined
-
Last visited
-
Days Won
35
Content Type
Profiles
Forums
Events
Gallery
Store
Articles
Videos
News & Articles
Everything posted by billydpowell
-

Passenger Door Lock Not Responding....help!
billydpowell replied to 2ton's topic in 90 - 00 Lexus LS400
sorry, no. you are just going to have to get in there and see what is not working. maybe one of these will help: http://www.clublexus.com/forums/gs-s...ators-diy.html http://www.clublexus.com/forums/gs-s...tuators-3.html
-
YEP.....the starter will fix it... I had to put new contacts in mine too... that was nearly a year ago. but all is fine now.
-
Looking For Lexus-Friendly Mechanic/dallas
billydpowell replied to LS400Luver's topic in 90 - 00 Lexus LS400
this is the one I went to: JP Importz Lexus & Toyota Repair & Service 3521 Security St, Garland, TX 75042 » (214) 221-3135 Jason Phan of JP Imports, Garland Texas did an outstanding job. They are a little hard to find, because their building (shop) sits behind a building that facing the street. -
P1350 Vsc Off And Check Engine Lights
billydpowell replied to jsmith20's topic in 90 - 00 Lexus LS400
NOTE P1350 is P1350 VVT Sensor Circuit Malfunction (Bank 2) bank 2 would be passenger side, harder to get too, I would suggest cleaning both of them. clean the valves and the chamber they fit in.... just in case, take a look at this, yours is probably different, but who knows: http://us.lexusownersclub.com/forums/index.php?showtopic=67171&st=0&p=422816&fromsearch=1entry422816 -
Passenger Door Lock Not Responding....help!
billydpowell replied to 2ton's topic in 90 - 00 Lexus LS400
this fixed my 99, see post # 5 http://www.clublexus.com/forums/ls400/518497-1999-ls400-actuator-door-lock-repair.html -
well just take it apart and see what the problem is and we will try to help you fix it or get it fixed. just telling us you have a problem is not enough info for any of us to act on. good luck and welcome to the club
-
It is good to see eatingupblacktop & jcrome04 back on the forum.... you have been missed.. Welcome back.. hope you are doing Very good.
-
Looking For Lexus-Friendly Mechanic/dallas
billydpowell replied to LS400Luver's topic in 90 - 00 Lexus LS400
Davenport Motor Company ONLY Lexus. JP Importz Independent Lexus & Toyota 2 good ones. -
99 Ls400 Center Dome Light/ Moonroof Panel
billydpowell replied to dormicum's topic in 90 - 00 Lexus LS400
thanks, I just filed it away. -
this might help: LEXUS CD PLAYER Do you have a compartment above the glove box? If so, are there two "doors" inside? One is for holding cd and the other is the outlet to insert the cartridge in the cd changer. Your cd changer installs behind that compartment and you will have to remove the glove box and that nice wood panel in order to install the cd changer. This may sound hard, but it is really easy. Toyota really thought this out and after you start unbolting stuff, it makes SO much sense. Just be careful not to pull on things too hard. You will need a ratchet, extensions and 10MM socket and a 2 philips screwdriver. I used a small one and a long one because removing 3 of the philip screws is a lot easier if you have a small screwdriver. To the bottom right of the glovebox is a 10 mm bolt. Unbolt it (you may have one on each side. These bolts loosen the glovebox assembly. This along with some phillip screws drops the entire glovebox assembly. There is also a panel that attaches to the glovebox assembly. I think it has 3 clips that when pulled, comes off. A floor light may be attached to your panel, so don't pull it too far or hard..leave all that intact..no biggy. You've got to completely remove the lower glovebox assy, then the upper glovebox door, then the upper glovebox liner. There's a 10-mm nut on the rightmost edge of the dash trim. You'll need the passenger door open to get to this. Memory is it's about knee-high. Now take everything out of the main glove compartment. Note in the back that there's a small pop-out "door" rectangular, about 1 x 1½ inch. Behind this is another 10-mmm nut that has to come out. From here it's fairly obvious which screws have to come out. The upper glovebox door has to come off, but you first have to remove the lower glovebox completely to get at the screws. Also the upper door has a damper assy on the left side and a guide rod on the right. Both can be removed with a knife blade to pop off the triangular-shaped covers. Finally the upper glovebox liner comes out. Then you'll be able to see & reach the bolts holding the CD changer in place. Good luck! There are also phillips screws and a few more 10mm bolts, but if you remove the 1 or 2 that loosen the glovebox assembly, the rest is very simple. Just make sure that you remove the glovebox carefully, because these are 3 plastic clips and if you yank on the box too hard, you may break those plastic clips. Pull it carefully and you will hear them click apart. Once you do this (remove all 10MM bolts and phillip screws), you will see the screws that hold the nice wood panel. Remove the screws and/or bolts, and you should see a place to bolt up your cd changer - 2 10mm bolts and 2 10MM screws that attach your cd changer to the frame that holds it. DONT forget to attach the connector to the cd changer. I would also test the cd at this point. Place a cartridge with a cd in it and see if it plays. If this is your first time, just be very careful and write down or remember the disassembly process. Reverse it to put everything back together and you should be set. Depending on your comfort level and experience, it is a 30 to 45 minute job. I know :-) I bought a cd changer off eBay. The first one didn't work - but I didn't test it before putting it all back together..so I had to take it all apart, send the cd changer back to get another one. I have a 97, but they are all similar in design. Good Luck - It's a piece of cake.
-
99 Ls400 Center Dome Light/ Moonroof Panel
billydpowell replied to dormicum's topic in 90 - 00 Lexus LS400
not really, but please post it when you find out.. -
just guessing, but the leaking PSP could be keeping the Alt from charging properly... change the pump 1st
-
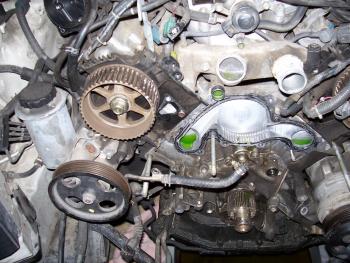
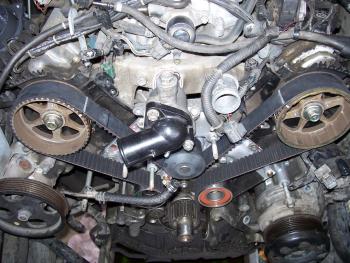
no, we did not rotate the crank..... and we have replaced 5 TB jobs for family members and all ran /runs great, without rotating( we didnt know you were supposed to do it).... and now we know you dont have too. 3 LS400 & 2 LX470. we just aligned the marks, removed the old belt - done our work- put the new belt on, never turned the cams or crank...
-
when we done my 97, we took the old belt off and the new one on, and it looked like this:: then we put it together and it ran perfect.
-
first, turn off your caps..... then this might help: http://us.lexusownersclub.com/forums/index.php?showtopic=60789
-
I hate to say this, but you need Lexus professional help, we have several independent garages who specialize on Lexus'
-
SKIP: Meineke, & Firestone. they just add-on unnecessary parts. an independent is best if they work on Lexus'
-
seems like it would be throwing codes for you.. with the cats getting so hot, it is running rich, I dont think lean would heat them up, so check the mass air flow out, and your throttle body. surely you have checked your air filter..... check the tutorials on this link for some ideas. http://www.lexls.com/
-
-
http://www.lexls.com/
-
Tutorial For 95 Ls Spark Plugs, Wires, Caps, Etc..
billydpowell replied to david1walker's topic in 90 - 00 Lexus LS400
just use OEM wires,(they have lasted 16 years) and they go on just like they came off.. lay them out in order.. caps/rotors.... plugs? no real way to mess them up. -
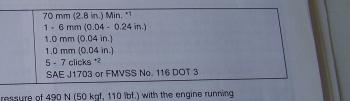
just read your manual, mine says DOT 3
-
are you sure it is not coming from the A/C?
-
Who Makes The Shiniest Tire Protectant?
billydpowell replied to david1walker's topic in 90 - 00 Lexus LS400
I use turtle wax wet n black -
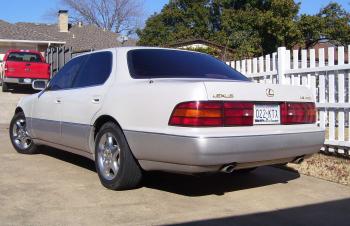
How To Change Right Rear Side Marker Light..95 Ls400?
billydpowell replied to LS400_95's topic in 90 - 00 Lexus LS400
Billy is usually very accurate ... but the the last LS400 model year that bulbs in the rear fender mounted light housings were replaced via the trunk was 1994. yep, I remember changing one, must have been on my old 94.. I depended on my memory instead of looking, and at 77 my memory is -- (censored) ... so sorry. my old 94: