Leaderboard


Popular Content
Showing content with the highest reputation on 02/27/2024 in all areas
-
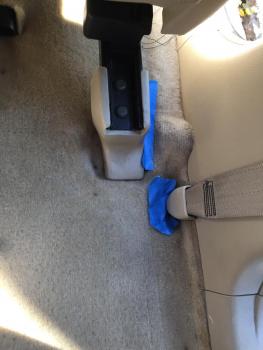
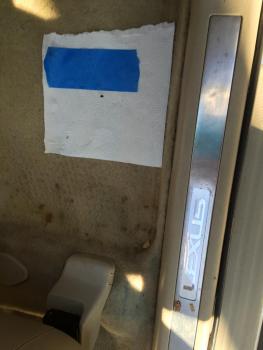
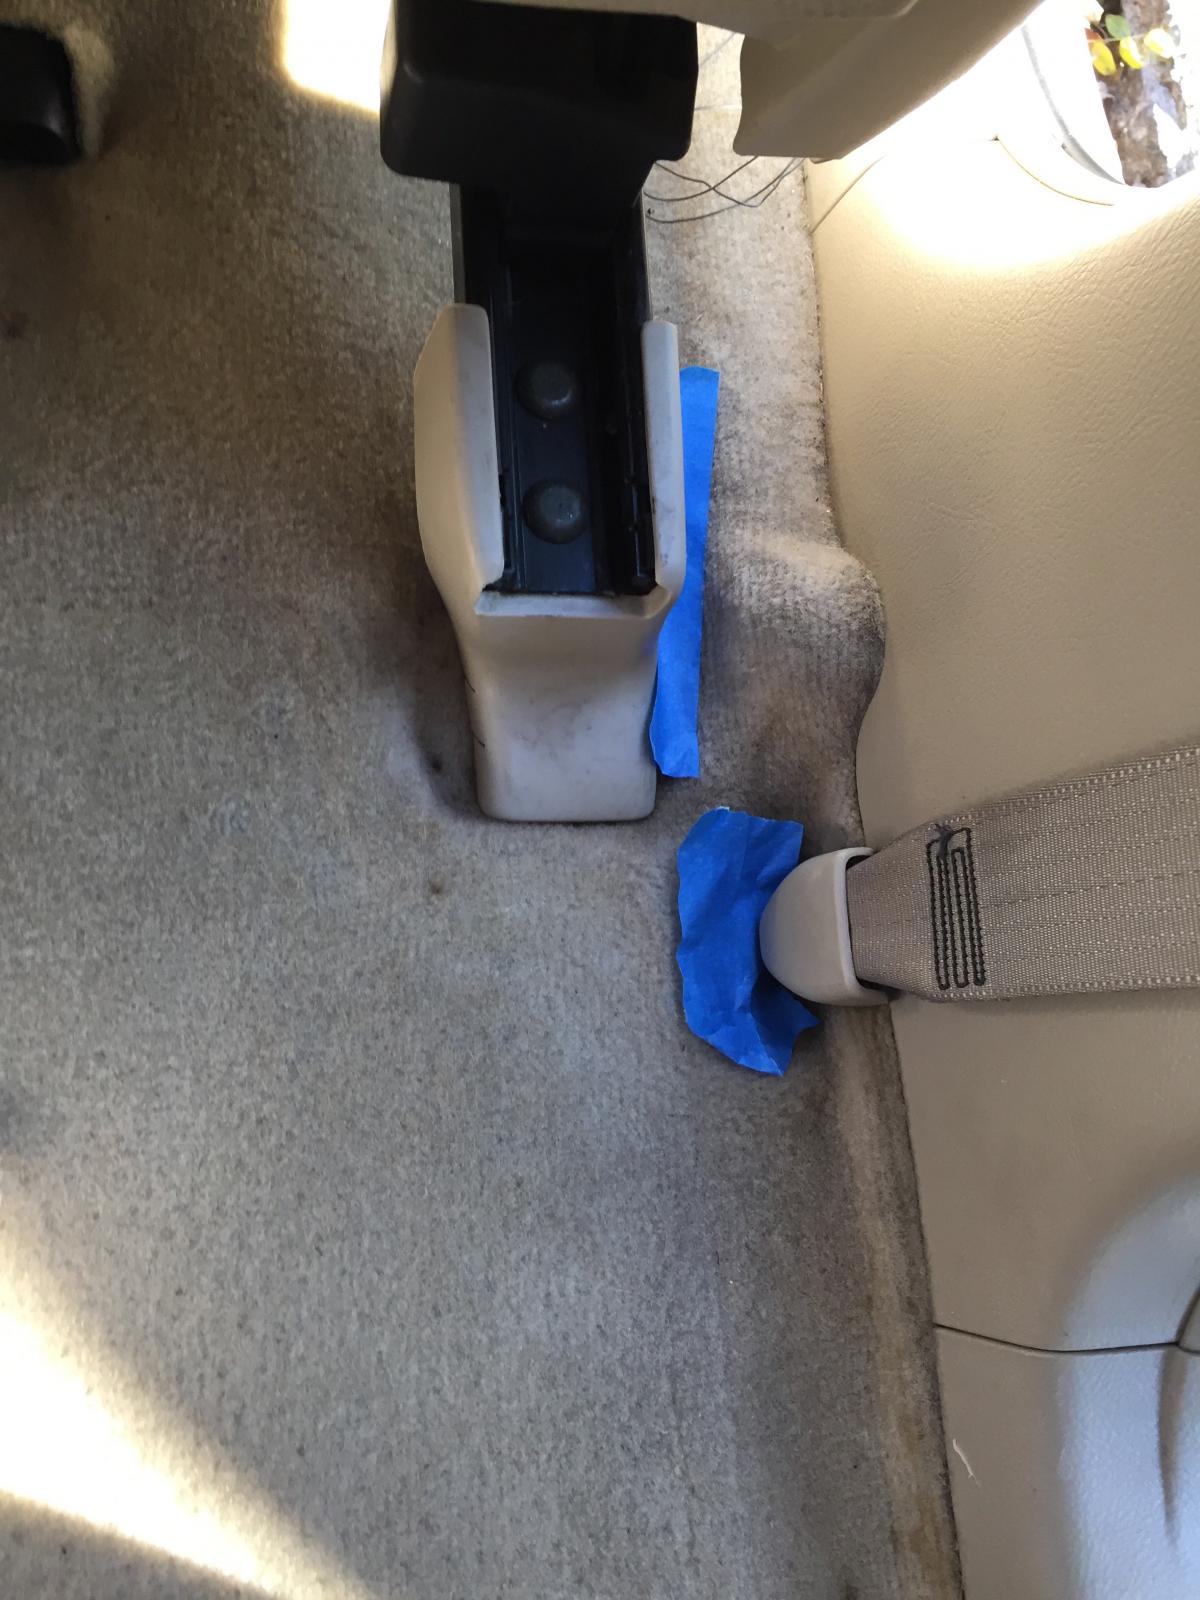
Already checked the AC drain and that was fine, not to mention I haven't been using it. Next I fished weed-eater line down the two front drain holes of the moonroof. That still didn't solve it. Next I put a tarp over the vehicle and, next rain, it still didn't solve it, though it may have reduced it. So it should have anything to do with the moon roof. It is only the floor that is affected and it begins in the front passenger side, and in a well behind the front passenger seat where the seat belt attaches. I'm not sure if it begins in one area and then is draining along the floor of the car to the other area, or if it affects both at once. The answer would apparently lie behind what is hidden behind the trim of the front passenger door. Are there photos online anywhere that shows me what is behind that, and also perhaps a tutorial on how to remove that trim (I'll also need to if I want to pull back the carpet and really make sure it dries out)? On the photos attached, I highlight the depressed area in front with a paper towel and put a blue strip where a line of moisture first appeared after a rain. In the rear photo, I blue tape shows the area where water accumulates by seat belt and a strip showing the general route where water may be traveling between back and front. No problems stand out when inspecting weather stripping. I wonder if a drain is clogged somewhere. Could anyone point me in the right direction? I'm sure a dealer would charge an arm and a leg just to diagnose it.
 1 point
 -
I have sevral diag tools the cost is way more than a dealer diag my tools cost around 5,000 for each one as there is different tools for diag not sure how far you are from me if u was close I would be more than happy to diag the issue there is a few things we can check when you have the time1 point
-
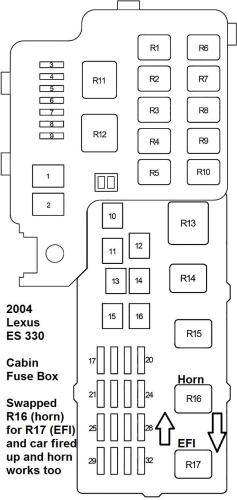
I want to thank you for posting your fix. I used it today it worked. My battery was drained and then I recharged it. Afterwards the engine would crank and try to catch but seemed like it wasn't getting fuel for fire. I had spark but no fuel. I was convinced something in the security system had immobilized my car. I had a strong battery, good starter and alternator. I had no problem with my car before the battery was drained. I found this post from 2010 and tried it in 2024. From the fuse box under the hood near battery I removed the fuse box cover. I swapped out the Horn Relay (R16) with the Electronic Fuel Injection (EFI) relay (R17). The relays were the same size, shape and original Denso brand. When I I hit the key it fired right up. Thank You Lexus Owners Club!
 1 point
 -
Most cheaper tools will read the sensors but not what the ECM is reading so the tool will show everything fine but in the ecm it will not as far as the dome light that is a loose bulb1 point
-
Another possible option is a Toyota dealership. I have saved hundreds of dollars by having them service our hybrid which has an identical powertrain as the Toyota highlander of the same era.1 point
-
And if the old sensors were not deleted from the ECM before the new sensors were added the ecm is most likely confused I guessing they were not programed correctly or there not the correct sensor not sure if you took a picture of the new ones before they were installed as I would be able to tell you if there correct1 point
-
I have a tool that can read twice as much information that tool is reading and as always launching a parts canon never ends well I would have diag the issue before the sensors were replaced honestly it will take a high end scan tool to correctly diag those sensors and the ecm that controls them and did you replace them with OEM the only ones I found that work correctly is Denso you can get those on Amazon for about 50 dollars for one1 point
-
Might have missed it, but do you have a spare tire that might have a TPMS sensor?1 point
-
Have you tried a Lexus dealership?1 point
-
Yes you will need to remove the inner fender liner now there will not be no big access point but you will be able to use a long screw driver to remove the rubber garment as far as making the drain hole bigger there is absolutely no reason for that when the weather warms up a bit here i will go back and take it apart and take pictures of the process so everyone can have a better understanding of the design1 point
-
It was not the easy way most take but I pulled out the existing line and cut it off and added a plastic barb fitting and crimp clamps to make sure it would not come apart then I had to remove the fender liner to get access to that drain poped it out measured the length of a new line I needed same diameter as factory added another barb fitting and crimped the line side the other side went down in the rubber garment then I pushed it back down into place the job is time-consuming but I am not a fan of drilling holes1 point
-
2015 rx450h - couldn’t find the drain holes for the sunroof. Then saw the diagrams posted on another site. The drain hole is on the front side (on each side). Ran a weed wackier line (1.9) with a point crafted with wire cutters at a slant down the hole. Water immediately ran out on the driveway.
 1 point
 -
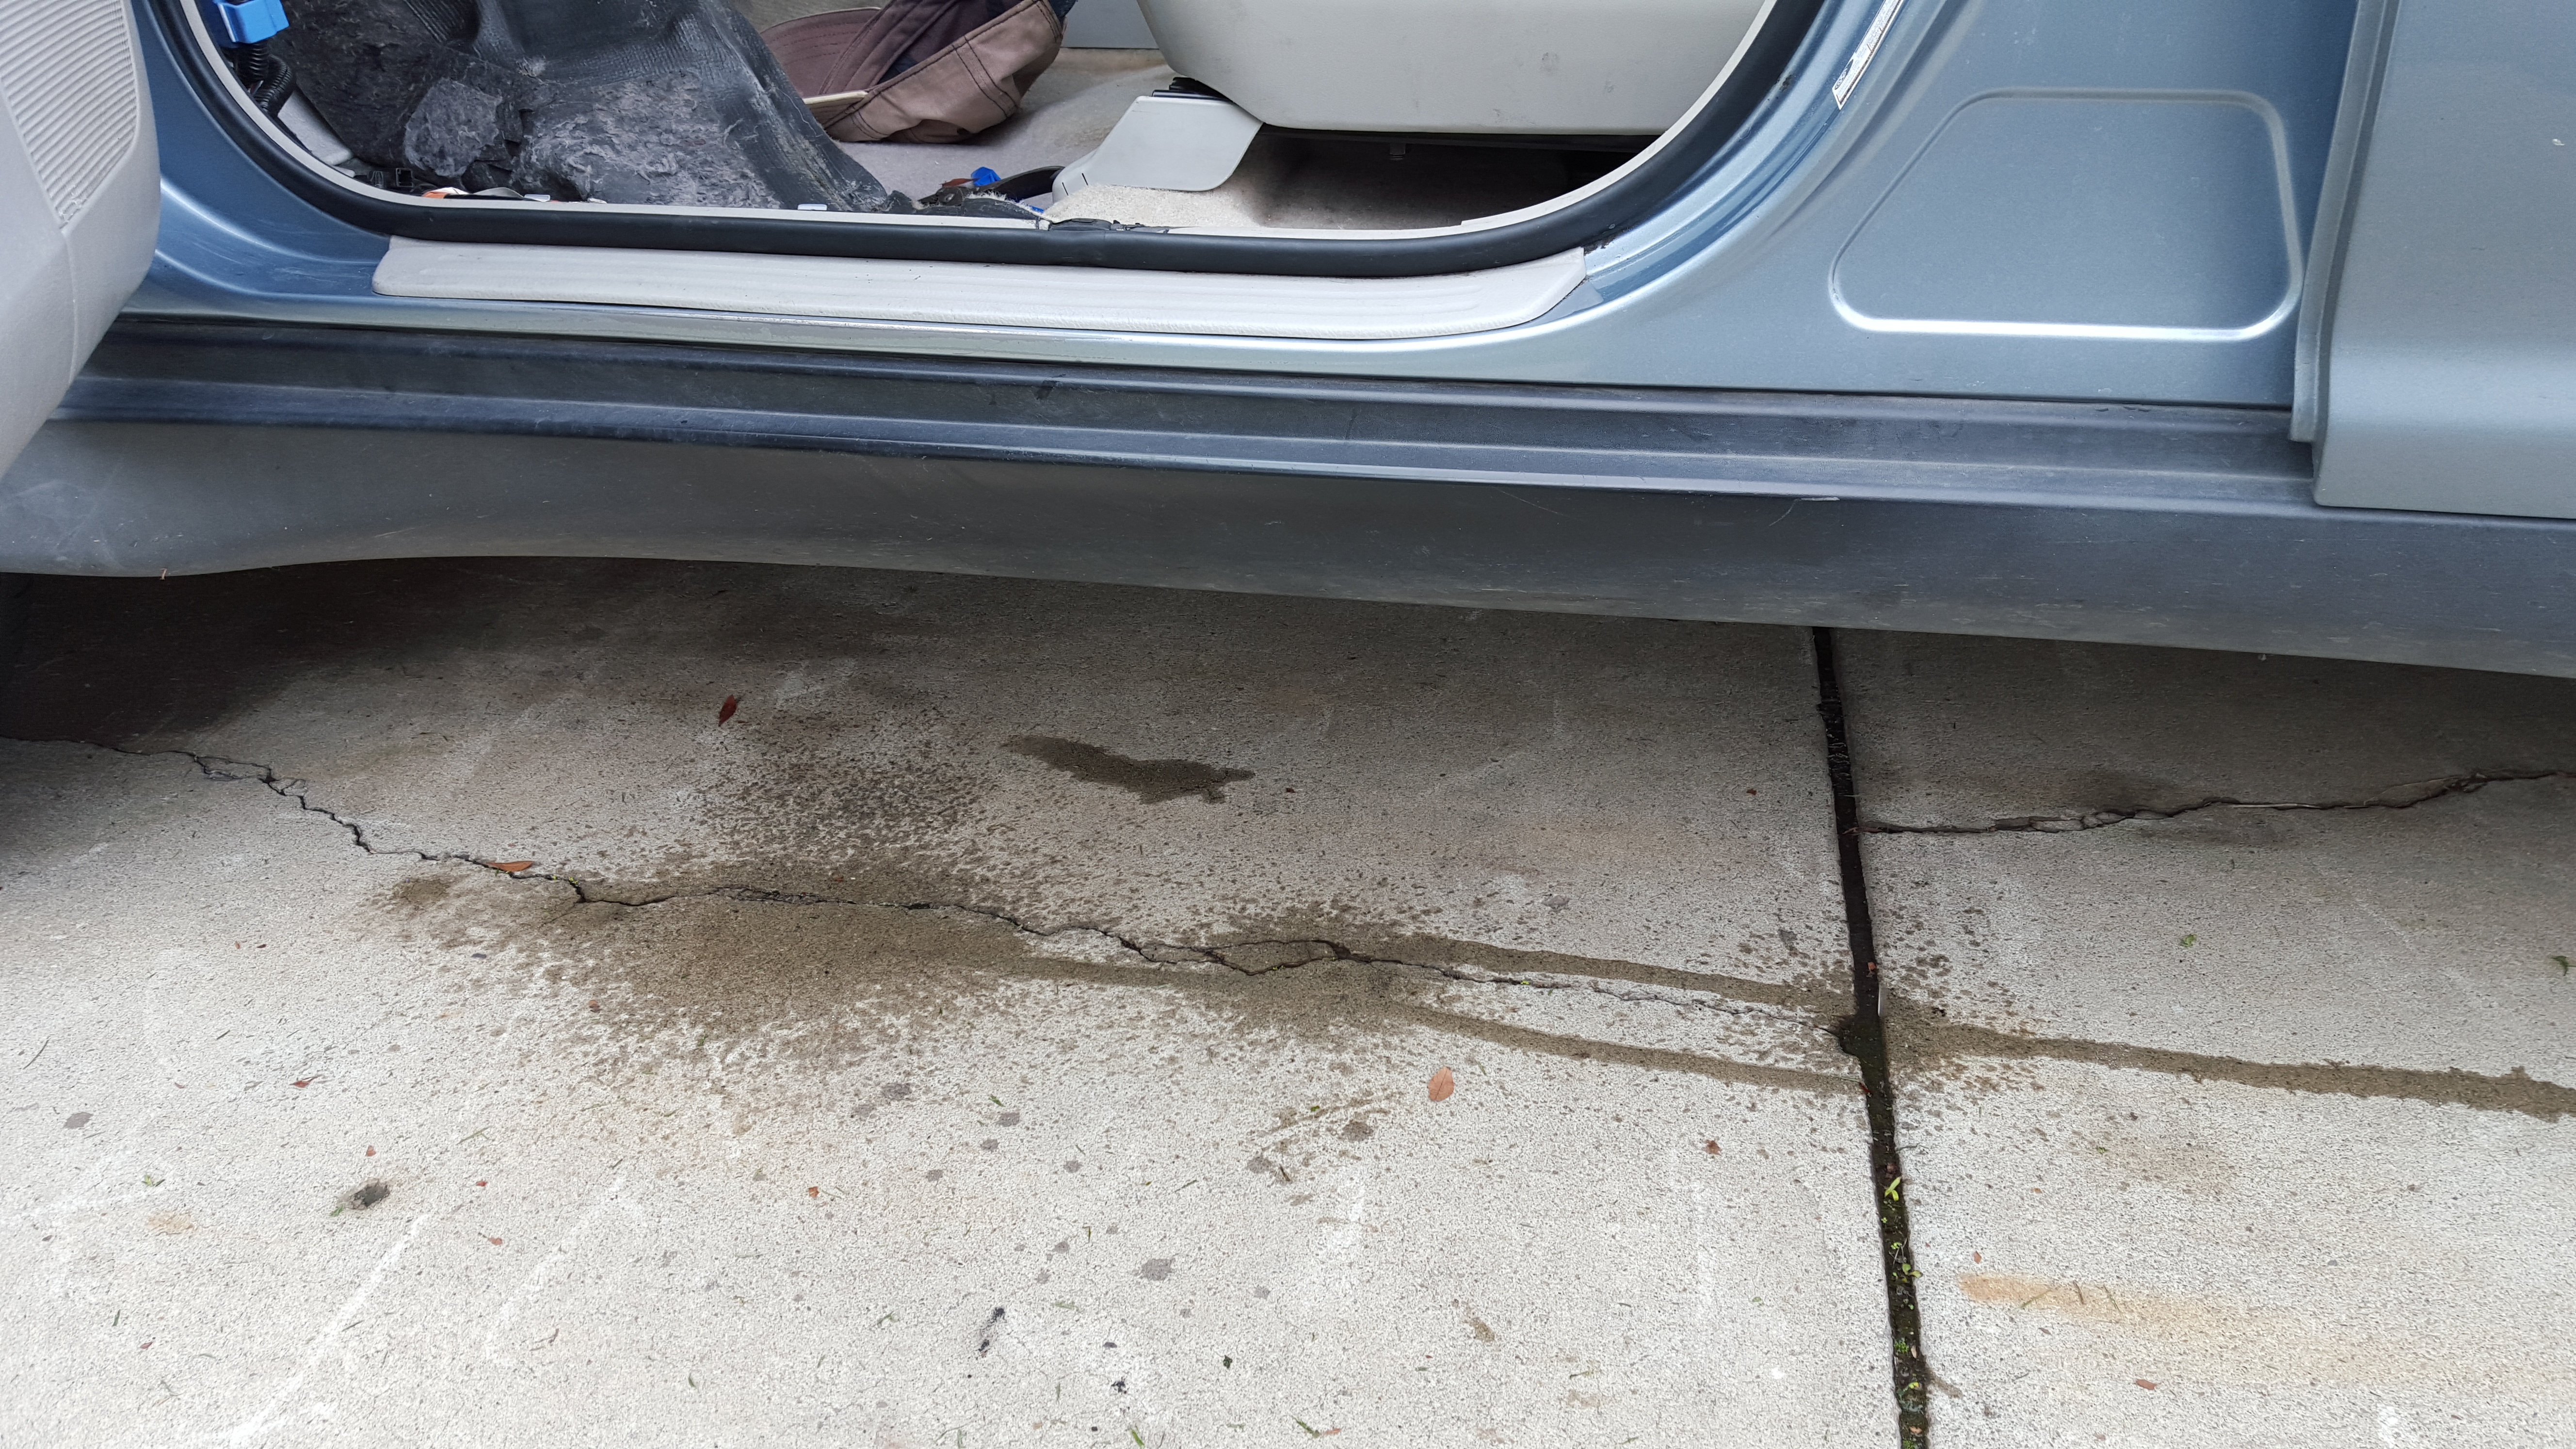
I had the same problem wet floor right front and rear passenger side .... with my 2007 Lexus ES350 .. It was the AC drain hose that came off. it is located on the front passenger foot area on the left hand side .. see pictures.... I thought it was the sunroof but no leak holes are on this model like the RX models... I hope this helps !!
 1 point
 -
Hi Ron_S, I had a really hard time accessing that drain but made some progress using a bent wire hanger and scraping around down there. Then I built a very thin shop Vac extension using rolled up paper and was able to pull out a lot of debris. The other thing I did was bang, rock and wash the body molding below that drain...the black plastic running below the doors. A TON of dirt came out when I did that. I think that was affecting the draining as well. It's been two years and I've had no more issues. It's still a crap design but it's hanging in for now. Hope that helps a bit.1 point
-
Having the same problem ... 😞 i think I got two suspects for water coming in at passenger area and then moving towards back seat of passenger area: 1. tested all four sunroof drain holes, front two are kind of slow, i noticed water drips from three-four places at the bottom black plastic rail/trim (near front passenger tire and also between passenger and rear passenger seats) when I pour water in front passenger side drain hole on the sunroof. which makes me think, the blockage is at the body frame(footwell) where drain pipe drops water and it got clogged up, or slow to drain water from here to ground. to clean this part, what do you suggest? should i remove the electric parts ? not sure how another user(zeppo) got the pic of it. i think its the culprit in my case, let me know if you have any suggestions(attached pic from prior reply from another user) 2. Another suspect is the leaves/debris below wiper in the front windshield since i was parking under the tree 😞 i can clean the leaves etc but not sure how to open and elan under it , just to make sure there is no blockages from this drain.
 1 point
 -
I made a tool out of stainless steel wire and used the hole that the water was overflowing out of. I was able to clear out the drain again with the tool. tested the drain by pouring a gallon of water from the sunroof. no more flooding and the water came out of the seams of the chasis as it should. No need to mess with the electrical or extend the hose. It took about 20 minutes of poking around to feel for the drain hole. It feels rubbery rather than metal sheet metal so you can tell if you are hitting the hole. i tried attaching pics but it doesn;t seem to work for me.1 point
-
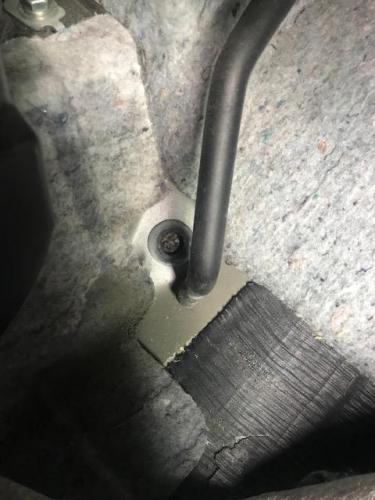
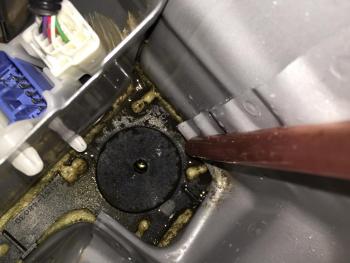
The hole is set into a conical piece that acts as a drain to catch water coming out of the hose. I've seen speculation that in a case like this the hose has shrunk a few inches over time from where it was once inserted into that hole, but I don't think that is the case at all. I think the design is just as you see, with the hose stopping a couple of inches above the drain. The compartment is water tight at the bottom, but when the hole gets clogged it fills with water until finally pouring out a small hole in the sidewall of the compartment and into the interior. Blowing out the drain hose with compressed air could solve a hose blockage, but you would probably have to get lucky for the air to dislodge the debris blocking the drain hole at the bottom of the compartment and not have it fall right back into the drain and clog it again fairly soon after. The hose I rigged to my shop vac with duct tape is 3/8" in diameter, and can actually just fit down into the drain hole if you feel your way around. I vacuumed the sludgy stuff out of the bottom of the compartment and drain hole as best I could by blindly feeling my way around it with my hand down in the compartment. The 3/8" hose will also just fit snuggly inside the moonroof drain hose that you see in the pic. That hose hangs freely, so you can pull it out of the compartment if you want to fish a line through it from the bottom, or as I did, vaccum it with the smaller 3/8" hose (it didn't yield anything from it in my case). After cleaning it the best I could I poured a little water into the compartment and watched it finally come out of the bottom of the car. It can take a bit of time for it to appear and not yield everything you poured into it, because it drains into the plastic compartment that runs below the doors on the exterior . But as you pour more down it, it eventually pools inside there enough to where it starts pouring out more readily. Some of what I poured in actually made its way down that exterior compartment and exited near the rear door in addition to what came out in the front end of it behind the front tire. I also ran some weed-eater line down into the drain hole, but you can't see where it exits because it just takes a turn and goes into that exterior compartment (which someone referred to as the "rocker panel".1 point
-
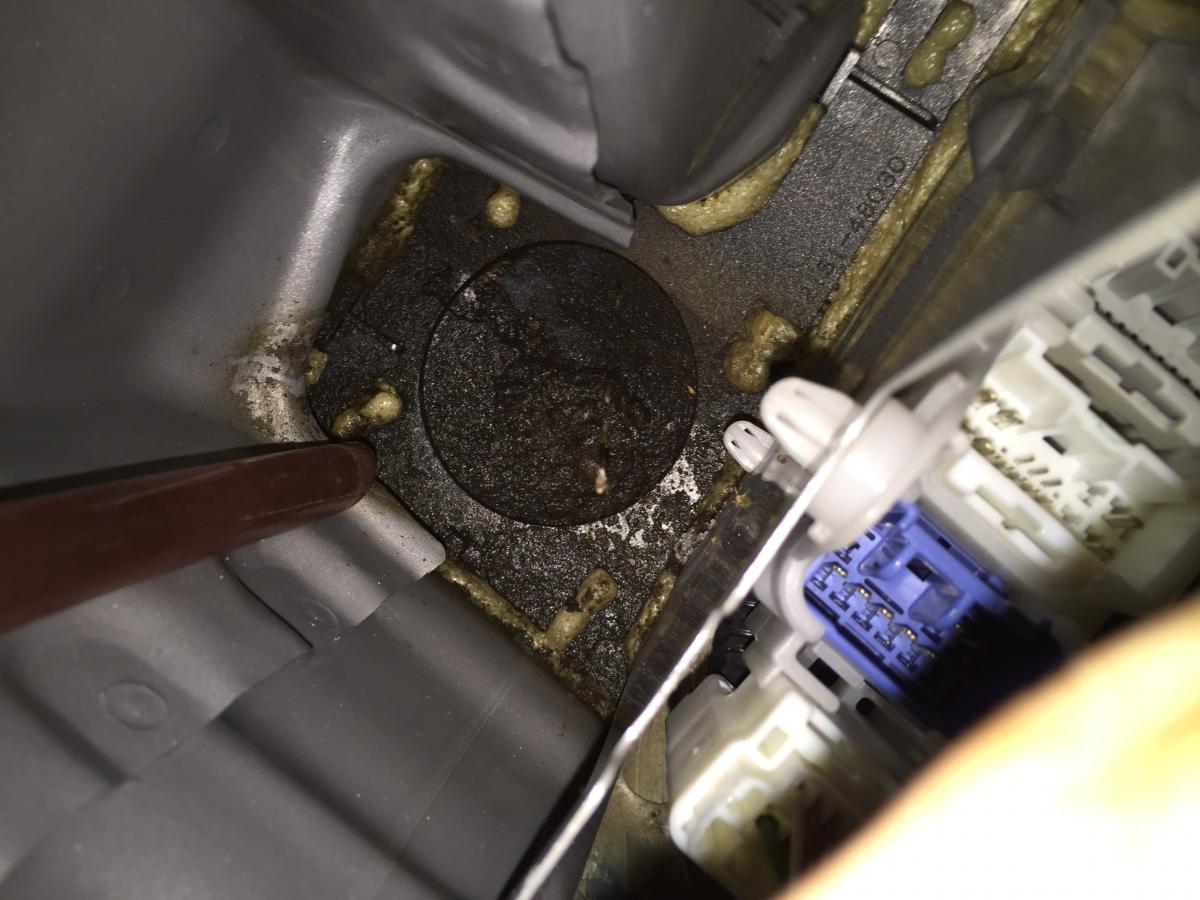
Now it is impossible to see down inside the compartment, but you can carefully insert a camera in there with the flash on and view it that way. I used a regular sized iPhone 6, but you just have to be careful not to scratch it or drop it in the hole if you don't have screen protection. Oh, by the way, before I did this, I rigged small hose to my shop vac and cleaned out any standing water. Here is the view of what the drain hole should look like (after I cleaned it out) and what mine looked like clogged up.

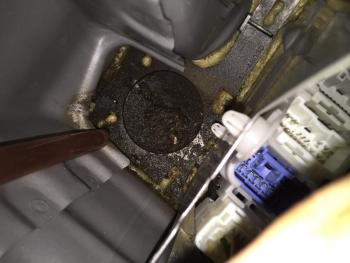 1 point


.jpg.64c2cfc44c3d64e624e4c1cff9820eb5.jpg)