richardkwon
Community Supporter-
Posts
69 -
Joined
-
Last visited
richardkwon's Achievements
-
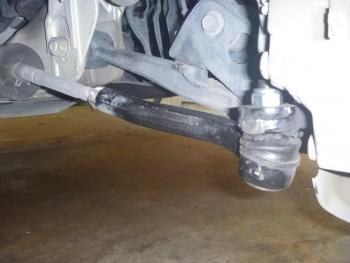
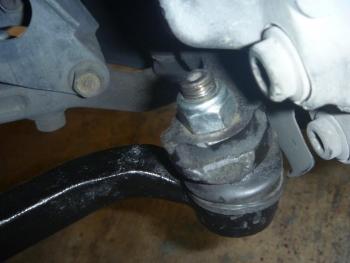
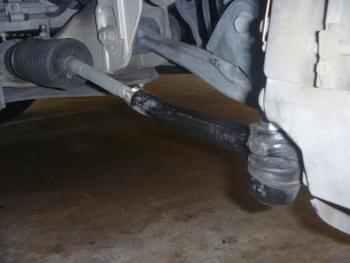
OK guys, it's been a year and a half since I've had to repair anything but now the outer tie rods are in need of replacement. Typical symptoms include popping over speed bumps, popping/click when turned all the way left or right and just a slight bit of wandering at highway speeds. Visual inspection shows the outer tie rod boots are now torn and compared to the new tie rods, there is some play. I've purchased new tie rods and was ready to go today thinking this would be an easy 1 hr job. Unfortunately, I can't seem to get the tie rod off. I loosened the nut that attaches to the rack. You have to hold the tie rod with a 21mm wrench and then using a 19mm wrench turn the nut right. Today I got as far as unscrewing the castle nut but could not take the nut totally off because the brake caliper was interfering and in the way so the nut will loosen almost to the end but cannot come off. This is seconday because once the tie rod is loosened, there should then be enough room to be able to take the nut completely off. My problem is the tie rod won't budge. I tried the hammer trick but it still won't move. Also, the tie rod castle nut is in the up position. Is this correct for this car? Most tie rods I've seen have the castle nut at the bottom. Any tips on how to remove the tie rod? The sledge hammer trick has worked for me in the past for other cars but not this one. Maybe I'm babying it too much and not hitting it hard enough? And in order to get the nut off, would turning the wheel all the way left or right allow room for the nut to come off? I figure if the tie rod becomes undone, there will be space for the nut to come off. Perhaps a trip to Autozone and the purchase of a Pitman puller is in order? The pictures attached are the passenger side.
-
Bra, da car be ee tin da oil cause of da valve cover gasket mon. And possibly da rear main seal ain't helpin ja nother. Check out my valve cover gasket tutorial any you should be fine bra.
-
You can disconnect the sensor and determine your fluid level the old fashion way or you can buy a new sensor. It's located at the bottom of the fluid reservoir. Sometimes the float gets stuck.
-
98 1uz-fe Timing Belt And Water Pump Replacement How_to
richardkwon replied to landar's topic in 90 - 00 Lexus LS400
Landar thanks again for all your help. I always felt comfortable knowing you we're just a question away. It was like having a master technician standing right next to me at all times. Feel free to visit anytime. Thanks again! -
OK sorry, I thought you meant the actual pulley itself. Good luck and I'm sure the car will thank you for the new parts. :)
-
98 1uz-fe Timing Belt And Water Pump Replacement How_to
richardkwon replied to landar's topic in 90 - 00 Lexus LS400
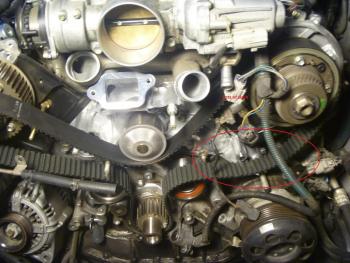
Got everything put together last night and the car runs great. When I first started the car, it started right up but shook a little bit and the "check VSV" light came on and white smoke was coming out of the exhaust so I cut the engine. I thought maybe I had not fully tightened the alternator bolts. You start trying to remember what you did. Did a recheck and yes the alternator bolts were fully tightened. Then I restarted the car. The VSV came on again and then went out after a few seconds. I think the initial shaking was due to the car sitting on jack stands at an angle and no oil in the front after having been completely drained of oil and the new oil control valves. Also when removing the valve covers I think some oil spilled onto the exhaust. After a couple of minutes of nice white smoke coming off the exhaust manifold, the oil burned off. Took the car for a spin and noticed a bit more power. Even got the tires to chirp in first gear. B) As for refilling the coolant it is a tedious job. First fill the reservoir. Then slowly fill the throttle body with 6 additional liters (1.5 gallons) of coolant. As the inlet opening is so small it takes awhile. When full, close the plug. I noticed that the new plug has thread sealant on the first few threads. Then run the engine for 10 minutes and keep topping off the reservoir. Keep checking for a few days as you will continually need to top off. As for installing the fan and the fan housing the best way is after installing the fan clutch, install the fan blade without the fan housing attached. Then install the radiator without the top clamps. This allows you to tilt the radiator towards the bumper and gives you plenty of room to install the fan housing. No more plastic edges to cut into your forearms! And this way it's so much easier to install the fan blade. I just used my left hand to hold the blade and tightened the screws with a wrench. When placing the air inlet housing back on make sure the long power steering air hose is routed underneath the housing and run along the fuel rail where the engine harness runs. In other words, the hose does not go over the air inlet rectangular box. Doing so will make the VBank cover not fit correctly. Another tip is when putting the water inlet (thermostat housing) back on, make sure the inlet tube and rubber o ring are inserted properly and fully. I thought I had everything inserted properly but later noticed the top of the mating surface was not flush and almost stripped my bolt. I am really happy and quite proud of myself. It took me a month but I basically did bits and pieces an hour here and there and really took my time. I also did my valve covers, cleaned out the throttle body and installed some additional parts so that took some more time. Another time eater was cleaning up everything. I'm a bit more anal than most. And I also had to wait on extra parts that needed to be replaced. The disassembly and assembly is literally a 2 hour job. I am very sure that if I had all the necessary parts I could do this job in a few hours now. What also adds time is the reading and researching and the fact that somewhere along the line you will get stumped and you may also break something. Just take it slow, label everything and take a lot of pictures. Be meticulous. There's nothing worse than figuring out if this is the right bolt. I had everything labeled and bagged and there were a couple of instances where it took me awhile to figure out which bolt or wire went where. I think if I had taken the car to a dealer they would have easily charged me $3,000 parts and labor for the timing belt, throttle body cleaning, spark plug change, replacing the radiator, crankshaft seal, various sensors, install of various new coolant and air hoses and new valve cover gaskets. Keep in mind I bought a bunch of new air and water hoses as well as new oil control valves, VSV, clips ,etc. The way I look at is with the money I saved doing my own labor I was able to get all these parts for free! And knowing I did the job means I did it right and not half assed or as my friend's dad used to say incorrectly "half fast". Tell me, how many mechanics would actually clean all your bolts and clean all the grease and dirt from your engine? All they care about is getting the parts replaced as quickly as possible. Also, don't fret too much about broken plastic clips. Our 1998-2000 model year cars are now over 15 years old. Thanks to that beautiful V-Bank cover, it helps to retain all that heat and cooks everything. Plastic and rubber becomes very hard and brittle. Even if you have the precision and delicate hand of an archaeologist, some plastic parts will still break. Don't worry. Just insert back, tape it, or use zip ties. Be careful of the wires and do not manhandle them. If you are really into fully restoring your car, the wiring harness (available as 3 separate pieces) can be purchased from the dealer for about $1400-2000. Installation is very easy. As for the timing belt itself I really believe the actual belt can last a long time. It's the water pump, worn pulleys, dirt, coolant and oil that cause the deterioration. The belt should rarely snap. It's the other items failing that cause the belt to fail. The water pump should always be replaced while you are there. If it seizes or starts leaking, the coolant can cause the belt to deteriorate in a jiffy. Thanks to Landar for all his help and his great tutorial which is the bible as far as tutorials go. But as good as Landar's tutorial is, I still had a lot of questions and confusion. Hopefully I have added some finer details and direction and clarity for the novices out there. And looking back, this entire job is very straightforward. There should not be a point or time where you should get "stuck" because there are no impossible angles or super tools that are needed. And thanks to CuriousB for his comments in the beginning. He really made me stop worrying that this was a difficult job especially regarding my jack stand question. I don't know why the hell I was worrying about having the car on jack stands. Oh wait, the reason was because I had thought that the car lifted at an angle would affect the timing. How stupid I was! So basically, if you've got 100K or so miles on your LS400, stop worrying and procrastinating and change out your belt and water pump yourself. You will save a lot of money doing it yourself and you will learn a lot about how great these cars are. -
Turn the bolts left (counterclockwise) to remove.
-
98 1uz-fe Timing Belt And Water Pump Replacement How_to
richardkwon replied to landar's topic in 90 - 00 Lexus LS400
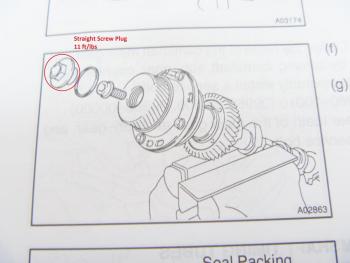
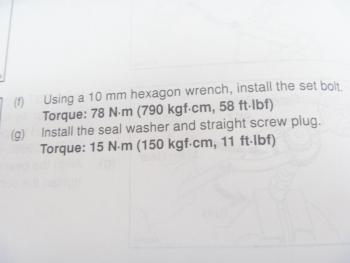
I checked the timing by making 4 full revolutions and everything lines up perfectly. Reading the service manual, there's a reason they indicate the use of the SST to hold/move the cams. The 19mm bolt (aka Straight Screw Plug) that I was using to move the cam backward is only torqued to 11 ft/lbs! No wonder why it kept coming loose. Before the screw plug, there is a seal washer. I guess it would have been nice to have an SST as it probably could have made things a lot easier. I looked online for this tool and there are varying costs ranging anywhere from $60 to $400, however, I don't think it is worth the cost. -
1998-2000 Valve Cover Gasket Replacement
richardkwon replied to richardkwon's topic in 90 - 00 Lexus LS400
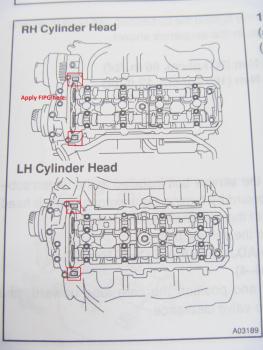
To install the VC gaskets, each rubber gasket will have several evenly distanced outer rib/nipples that run along the entire gasket and allows the gasket to stay in the VC valley when it is turned upside down to install. This is great so that you don't need to worry about constantly making sure the gasket does not fall out. No need to apply FIPG to the VC. Just apply the new FIPG to the 2 corners near the cam housing. See the pic. Press down and torque the bolts to 55 in/lbs by making several passes on each bolt. To torque the bottom bolts, I found an 18" extension with a swivel attached to the 10mm socket to be the most easy way to remove and tighten. Connect all the hoses and voila, no more VC leaks for hopefully several more years. -
98 1uz-fe Timing Belt And Water Pump Replacement How_to
richardkwon replied to landar's topic in 90 - 00 Lexus LS400
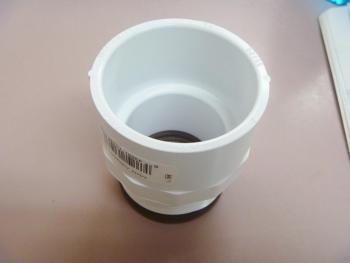
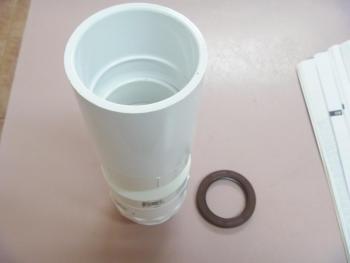
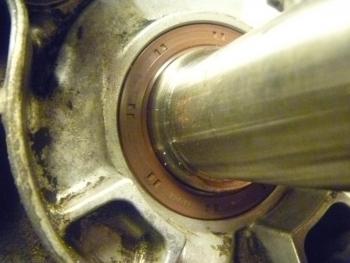
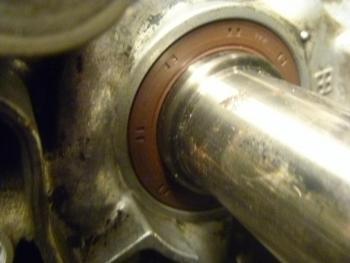
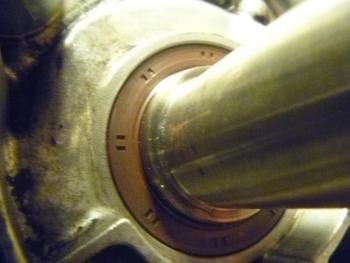
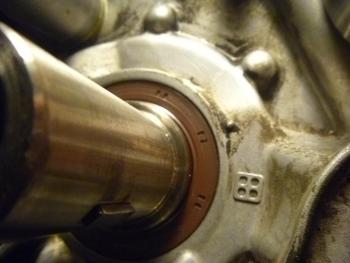
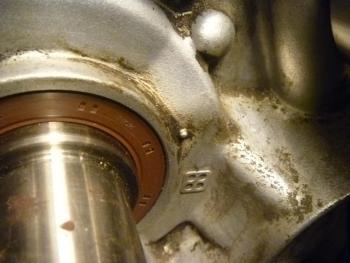
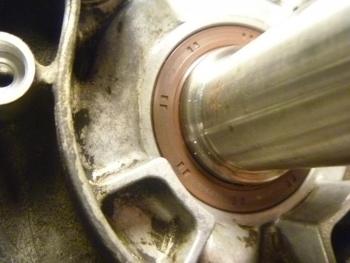
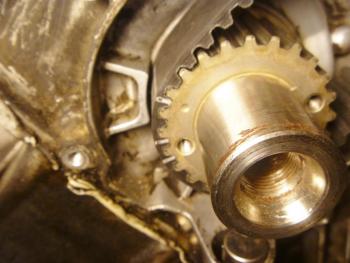
I also had the joy of making my own seal tool from Home Depot. I think mine was a 2" diameter piece of PVC pipe with a screw in insert. Just buy 2 or 3 that fit together and you will have the proper length to tap it in. Total cost was about $5. You can always use a small hammer to tap in the seal also but make sure the seal is inserted evenly and flush. My seal went in just a hair more than flush. There will be a point where the seal will be driven to its maximum and you will know. Don't over do it and start crushing the seal. Make sure to coat the lip of the seal with a little bit of MP (multipurpose) grease. I had the hardest time determining what the hell the "lip" of a seal is. After much diligent research, it's the inner part of the seal folks. However, DO NOT grease or oil the outer part of the seal! I guess the reason I am putting so much emphasis on this little seal is twofold: First, it takes a lot of work to get to this sucker and you don't want to go through this entire process again just to replace this $8 seal. Second, if this seal starts leaking, the oil will get on to your timing belt and will destroy everything which is not good. -
98 1uz-fe Timing Belt And Water Pump Replacement How_to
richardkwon replied to landar's topic in 90 - 00 Lexus LS400
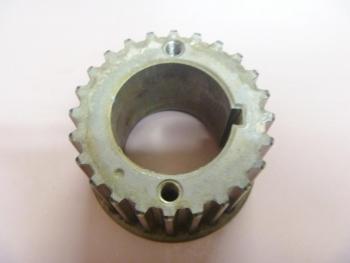
And before I installed the new timing belt, I cleaned out the grooves in the timing gear pulley and the front and back. I also tried to clean as many grooves in the cams as I could. I used brake cleaner and a bunch of Qtips to clean out all the belt dust and dirt. -
98 1uz-fe Timing Belt And Water Pump Replacement How_to
richardkwon replied to landar's topic in 90 - 00 Lexus LS400
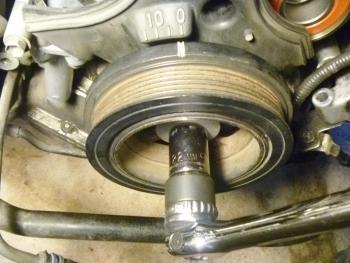
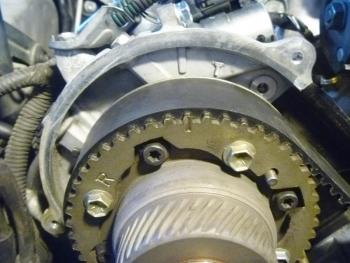
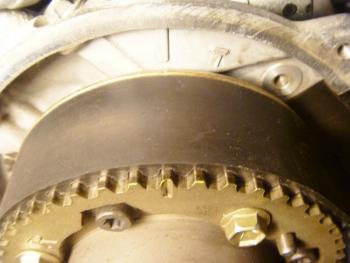
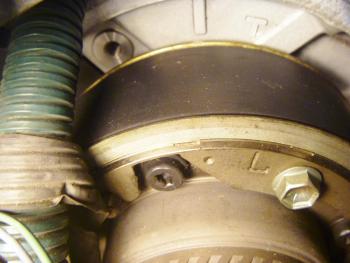
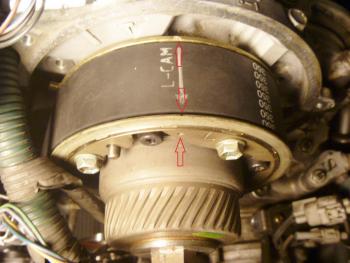
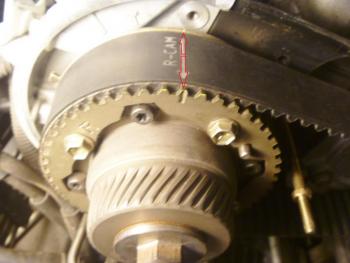
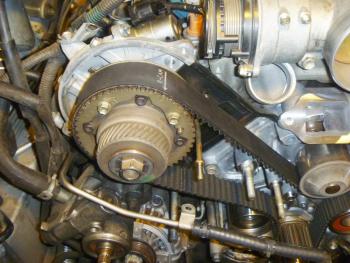
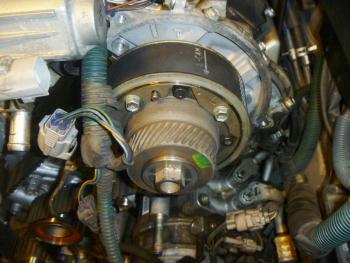
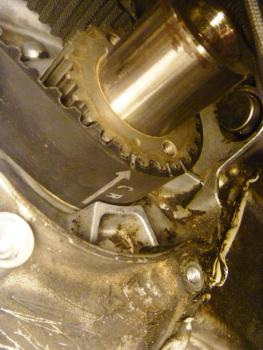
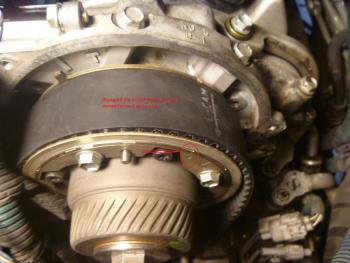
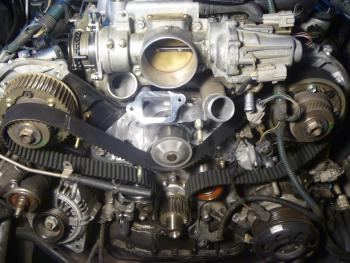
OK got the dang thing on. Took me about 1/2 hour and was very easy actually. Most of the time was spent retorqueing the LH Cam bolt so that I could get some leverage to back the cam. So basically, when I initially removed the belt, only the RH Cam moved a few degrees. The LH Cam did not move at all. When I put the new belt on, I had the CR mark at the indentation on the timing gear pulley and the LH Cam arrow on the LH Cam. When trying to maneuver the belt on the RH Cam side, the LH Cam snap rolled a bit forward. And then it did it again. This is the reason for the 50 degrees. It buys you quite a bit of wriggle room. And it seems like the cams will snap and roll for no apparent reason. The goal with first placing the belt on the LH Cam is to get as much tension on the LH Cam belt side so that you can easily slip on the RH Cam belt side. To do this, you will need to put a 19mm socket on the cam bolt to get the LH Cam to move back or CCW with the goal of aligning the LH Cam arrow on the belt with the indentation on the LH Cam. However, this is also how the bolt becomes undone. My bolt kept coming loose so that I was not able to move the cam backwards. So I used my old timing belt, wrapped it around the cam, tightened the belt together with vise grips and then holding the belt tightly, retorqued the bolt as much as possible. The cam moved forward again a bit but it was nothing to worry about. The service manual mentions to rotate the LH Cam backward as much as possible to get the belt on this side tensioned as tight as possible. Doing this allows you to easily slip on the RH Cam side of the belt. There was plenty of slack so that I was able to easily slip the belt on. No crushed fingers between the cam gear and belt and I only had to rotate the RH Cam backwards a few notches. Everything is now aligned. I installed the tensioner last (not installing the tension initially gives you more slack when putting on the belt). Now it's on to rechecking the timing marks before pulling the pin. Also when initially placing the belt on, make sure the electrical wires and connectors on the LH Cam side are out of the way. Thanks Landar for your instructions. I think it's all downhill and easy street from here. -
98 1uz-fe Timing Belt And Water Pump Replacement How_to
richardkwon replied to landar's topic in 90 - 00 Lexus LS400
Damn Landar, I'm sure glad you're here. I'll give it a shot tomorrow afternoon. I knew this was the part that I would get stumped. It's very frustrating because I'm constantly wondering if I'm turning the cams in the correct direction and what if I messed up the timing and so on. Thanks for the direction. -
98 1uz-fe Timing Belt And Water Pump Replacement How_to
richardkwon replied to landar's topic in 90 - 00 Lexus LS400
Landar, I tried installing the timing belt today. I had the CR arrow exactly on the timing pulley indentation mark hole and the LH Cam arrow on the LH Cam. Then all of a sudden the LH Cam moved clockwise to the right and now the belt on this side is very loose. I tried to move it CCW to bring it back to 50 degrees and will come back a little bit but then the 19mm bolt becomes very loose. So of course, now the RH Cam side of the belt does not have enough slack to slip it onto the cam as there is too much slack on the LH Cam side of the belt. What am I doing wrong and how do I fix this? -
98 1uz-fe Timing Belt And Water Pump Replacement How_to
richardkwon replied to landar's topic in 90 - 00 Lexus LS400
Yes I think at about 180K should be fine.

