lmnop
-
Posts
5 -
Joined
-
Last visited
Content Type
Profiles
Forums
Events
Gallery
Store
Articles
Videos
News & Articles
Everything posted by lmnop
-
1999 Rx300 Door Lock Actuator Repair Less Than $15
lmnop replied to indiana's topic in 99 - 03 Lexus RX300
Hey code58 & deus85, Glad to know that I could help. This forum gave me the confidence and insight that I needed to take a stab at this in the first place (since I've done little to no car repair in the past). It might have taken me a few hours over the course of a few nights, but I definitely enjoyed the mechanical problem solving that went into this and the sense of accomplishment I get every time I lock and unlock my doors remotely. Also, I feel a bit of civic responsibility to contribute back what I learned (since I learned so much from everyone else here). Thanks again for everyone's help, no way I would have been able to do this without it. I think I might be ready to take on the next issue with my RX 300... the weird moaning noise that happens when I turn my steering wheel (used to happen when it was cold outside, now it happens all the time...anyone have a fix for this :) ?). -
1999 Rx300 Door Lock Actuator Repair Less Than $15
lmnop replied to indiana's topic in 99 - 03 Lexus RX300
I actually ended up doing a much simpler fix on the front door... it could be done on any of the doors (assuming the back door panels leave as much room as the front door panels). I attached the new actuator to the door lock w/in the handle... so you don't have to get into the door very deep, just take off the panel. Basically, i just took a thinner rod/wire (than is included) and wrapped one end into loops that piled below each other (by wrapping it around a pair needle nosed pliers). Basically I created a small cylinder on one end that i could slip the metal connector at the end of the old actuator's wire into (there is a half cm of extra arm sticking out the bottom of the lock... when viewing it from the back side). My cylinder was big enough that it doesn't have enough room to fall off the extra half cm of arm... i should probably take my door panel off and take a picture of this connection as my description isn't doing it justice. I ran that wire from the back of the handle to the new actuator (i used a little bike brake cable housing to protect it), which i positioned to make sure that the panel would go back on. Anyway, here is the picture of it: Basically, this is just flipping the same manual lock switch that you see when the door panel is on. No idea how long it will work for, 2 weeks so far so good.
-
1999 Rx300 Door Lock Actuator Repair Less Than $15
lmnop replied to indiana's topic in 99 - 03 Lexus RX300
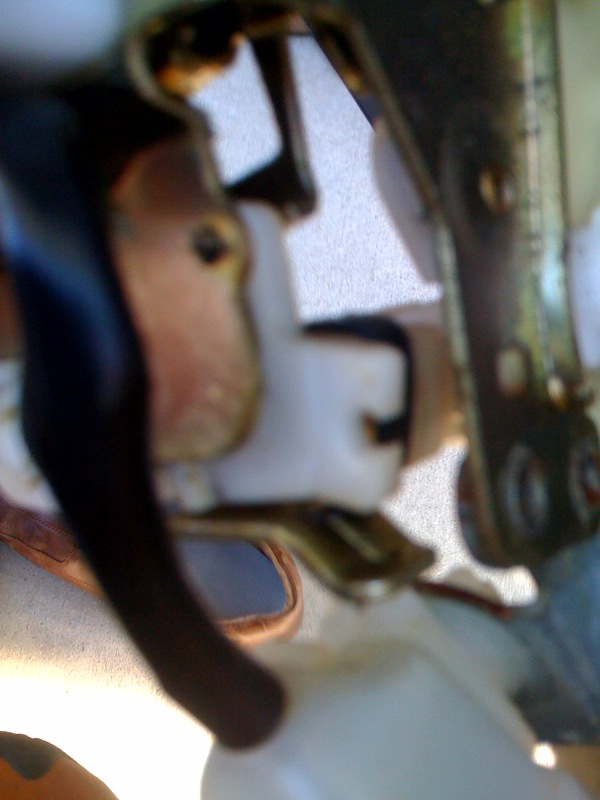
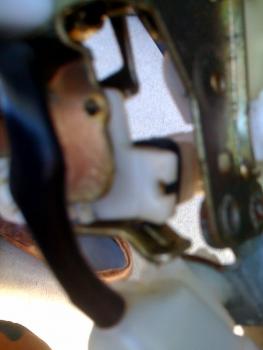
code58, here are two pictures of the open arm... think it is safe to put it through that?
-
1999 Rx300 Door Lock Actuator Repair Less Than $15
lmnop replied to indiana's topic in 99 - 03 Lexus RX300
code58- yeah, i wasn't too comfortable putting it in the door b/c of the window (I'm sure there is plenty of room though) and I liked having easy access to the actuator, so I figured that was the best place to put it. I found that rubber band bound arm, but from what I remember the hole had an open side that i was afraid the arm might slip out of. Anyway, after taking apart the driver side front door last night, I think I'm going to have to attach it at the location you're describing this time.... it is really tight around the old actuator with the door lock/handle arms, window guide etc all butted up in there. -
1999 Rx300 Door Lock Actuator Repair Less Than $15
lmnop replied to indiana's topic in 99 - 03 Lexus RX300
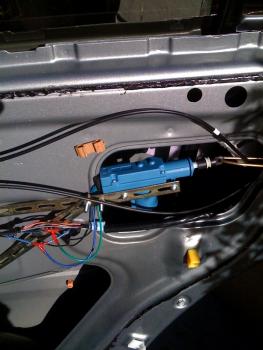
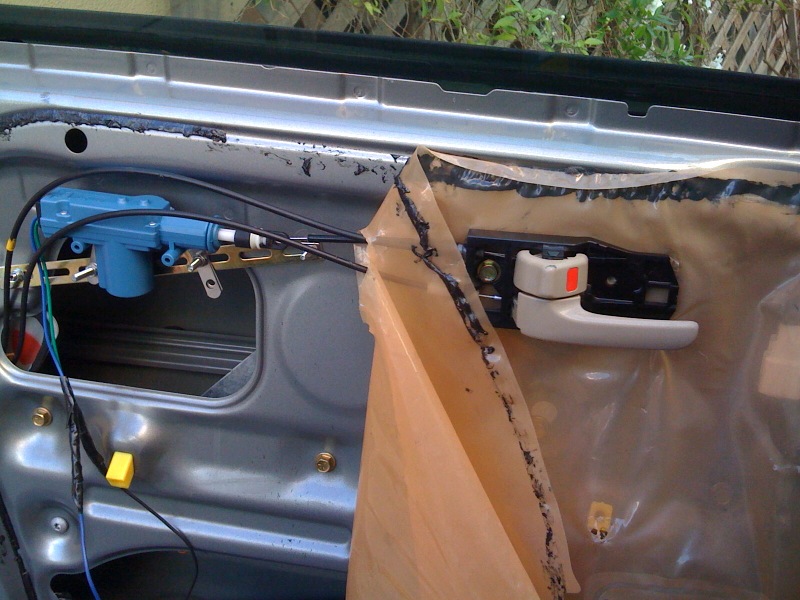
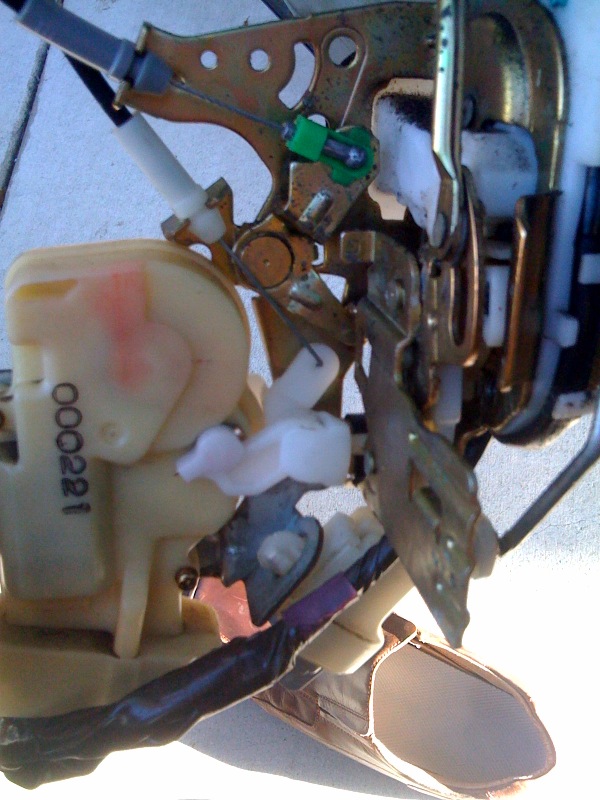
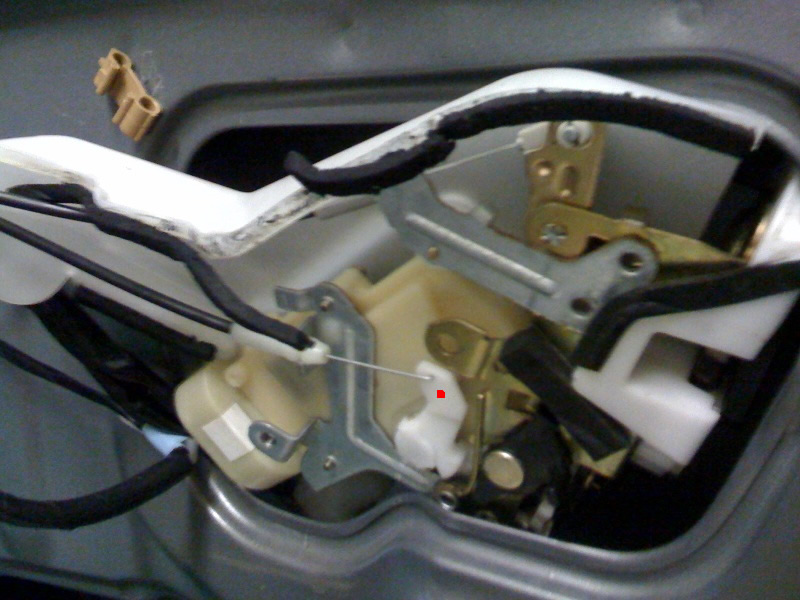
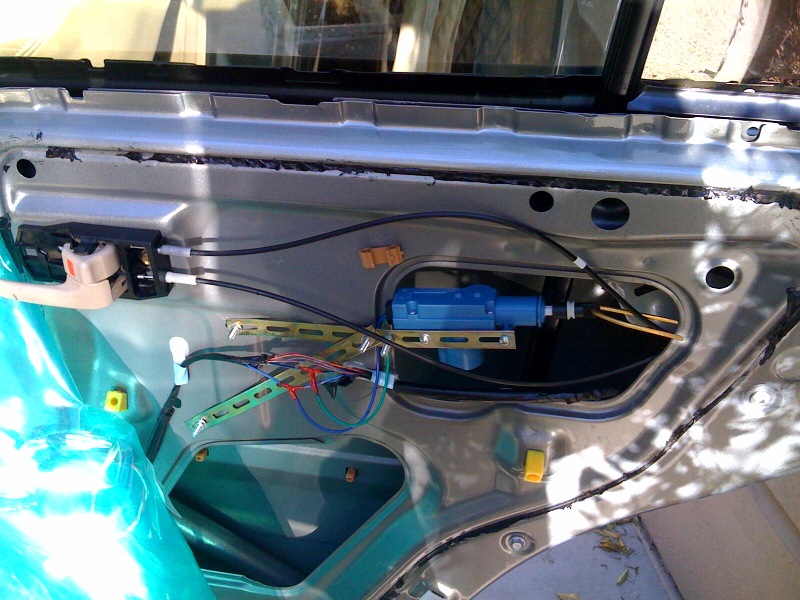
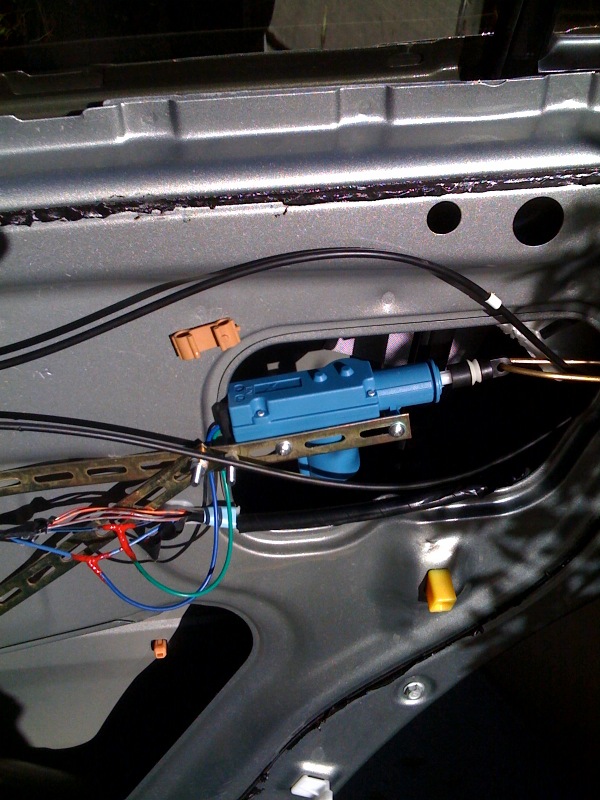
I did this over the weekend... It was a little more difficult than I hoped, but i got it done w/o ever having taken a door panel off of a car, or soldered before. One of the earlier links was broken so this is the actuator I used: Generic Actuator I ordered 3 just in case (I'm doing 2 doors), and tested them all with a weak 12v battery...all worked fine (though obviously really weakly w/ a small battery). Half of my problem, was just not understanding what I was reading here... looking back, everything makes pretty solid sense. So after I figured out I needed to take the entire locking mechanism off (but not out) it got a little easier. Here is a picture of the old actuator and locking mechanism squeezed as far out as I can get it (I loosened the window guide rail to get it this far but didn't take it or the window out). I put a red dot in the picture to show where I drilled the hole to attach the metal rod aka linkage... however, I used a piece of copper rod that I bought at Home Depot b/c it was a bit softer and easier to work with (but not too soft obviously). Once I drilled my hole I bent my rod in and bent it out the other end (like the original wire is bent above it) and followed it out the same line as the original wire and casing. Then I reattached the entire locking mechanism/old actuator w/ new rod attached... had to be pretty careful here. From there you can see that I attached my new actuator in the big access hole with 2 of the brackets... pretty snug fit. This one shows it a little bit closer, and where I soldered the new actuator wires into... the ones I tapped into were blue with a black stripe and blue with a red stripe. You can just mess with which one is on which wire by testing it until it is in sync with your other locks. The only think i'm worried about is that the new actuator has about double the throw (movement) than the old actuator arm needed... did anyone do anything to adjust for this... I had a few ideas in mind, but i wanted to see what everyone else did (if anything). Thanks to everyone who posted before with instructions, I really appreciate your help, this would have cost me like $1400 to do both doors if I did it at the Lexus dealership in LA... amazing. Now, for the front, driver side door :).