

lexlover1
-
Posts
25 -
Joined
-
Last visited
Content Type
Profiles
Forums
Events
Gallery
Store
Articles
Videos
News & Articles
Posts posted by lexlover1
-
-
Remember that the 1990-1994 engines were non-interference, and starting in 1995 they were interference.
Has anyone on this site or know anybody that has a 95 that broke a timing belt? Did
it damage the engine? Always wondered and have never saw any posts about this I mean real experiences? Also what exactly was done in 95 to change the engine? Thanks very much for replies.
-
The seat belts in my '95 would not readily retract so bought new ones and just completed the installation.
I completely disassembled one of the old ones and now I maybe know the cause.
The front seat belts in the 95 LS have a dual-speed gearbox within the retractor/tensioner assembly.
It has two clock springs that are used to retract the seat belt, a light duty low tension spring and a heavier duty high tension spring.
The retractor uses a solenoid actuated escapment to shift between the two tension springs.
The idea seems to be to use the STRONG spring until the belt is buckled and then lock the strong spring in place and only rely on the light duty spring.
The problem is, apparently, the escapment gets stuck in the low tension position, maybe due to the solenoid armnature becoming permanently magentized.
If you have this problem my suggestion would be to remove the "electric tension reducer" connections to each front seat belt that enables the retractors to "shift" into the low tension mode. Then pull the belt out to the fully extended position 3 or 4 times to be sure the escapment unlocks. With the connection open you will always be using the high tension spring but that's better than paying $300 for a new set of seat belt retractors as I just did.
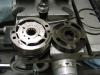
PIC is of a fully disassembled driver's side front seat belt retractor from a 1995 LS400.
Where exactly is the electric tension reducer connections? What has to be taken apart to get to the connections/
-
I just changed the TB on my '93 and it looked to be in perfect condition, but given the age I'm sure there was some dry rot or internal damage I couldn't see. My idlers were caked in muck and sang when spun by hand. Given that it's already been so long, and it's going to be a long time before you'll have to do it again, I would go ahead and do it. Checking your belt won't give you any indication of the condition of your idlers, and if they seize it doesn't matter how good your belt is.
Your engine is interference, if anything goes wrong in the TB assembly you're out an engine, I'd say do it for the idlers more than the belt, but do it all (water pump included, only go in there once)
Are all the ls engines interference? Or is it just the newer ones? I have read so many posts about interference or not I am confused. Supposedly the older es is not but the newer ones are, the newer ones have the variable timing.
-
Replace the l/f speed sensor and it will fix the problem. Code 35 pops up because the ecu uses signal from the l/f to match to the r/r, Code 35 is a bogus code as it has no reference signal to compare to. When you get a code 32 you will get a code 35. L/f and R/r work together as the R/f and L/r work together. Replace the l/f, that is your problem. Use a wire and jump pins Tc and E1 of the DLC connector, turn the key on and press the brake predel 8 times within 3 seconds to clear the code.
Hello Mehullica could you please tell me where the DLC connector is located in a 93 es. I have replaced a wheel speed sensor and have to clear the code. thank you.
-
Can somebody please tell me how to reset the abs light on a 93 es. I know I have saw it on here before but can't find it again thanks.
Let's take a step back. How did you end up with this problem? Did you do anything to cause this problem? ABS light doesn't just pop up unless there is a problem.
Replaced the abs wheel sensor, now I need to reset the light since unhooking the power don't reset it.
-
Can somebody please tell me how to reset the abs light on a 93 es. I know I have saw it on here before but can't find it again thanks.
-
Well the time is here to remove the starter on my 95. Gathering all the info I can get before beginning. I see most of the guys have left the upper and lower intake manifolds together when removing them. Wondering if you can leave the throttle body bolted on to the intake, or does it have to come off? If so most of the posts that I have read there hasn't been any mention of replacing the gasket. In the manual it says this is a non-reusable item. Any help greatly appreciated.
-
"Hi Ed I am not young but have a strong back and have to do the dirty deed. Just wondered after you removed the intake and everything hooked to it, how long before the starter was removed. Thanks in advance."
Lexlover, once the manifold is off and the starter is exposed it only takes maybe an hour to get the starter off. The reason it takes that long is the bolts come in from the rear and there is very little clearance between the bolt and the firewall. I used a box end wrench to remove the bolts but because of the clearance issues I could only get about 1/12 of a turn before having to remove and reset the wrench. I think that one of the newer ratcheting boxends that are available now might fit and make the job go faster. My ratcheting boxends are the old style and just too bulky to get into the space. It might be worth investing in a 14mm thin ratcheting boxend.
Regards, Ed
Thanks Ed I have read on a few posts that removing the intake was the easy part. Getting the starter bolts and the starter out of position is the real bugger. I have seen lots of pictures and know exactly how it is removed, hopefully I have lots of tools. Just wondered if you could make a list of parts needed for the task. Not sure if you can see them or not but the starter bolts seem almost impossible to see with the intake on the engine. I mean I know where to look but I think it would be to great advantage to be tall to see and reach in there. Mine has been in storage for the cold months but coming out real soon. Was yours clicking or did it just stop working all at once? Mine has been a clicker for a while. Guessing you never got into the tearing apart of your old starter since you sent back the core, wondered how the contacts were inside. Thanks for the info much appreciated.
-
Grand,
Thanks for the great thread. Your information, pictures and comments on your experience will be beneficial to all of us. I do hope you will put together a tutorial on this since this is something many of us will face in the future.
My compliments on a job well done
Denny
Your welcome.
Wish i took some pics along the way, but I did not, too much frustration at times to take out the camera and snap pics. But I'll be here to answer any questions i can.
Grand LS 4, Just wanted to thank you for your post. I just finished changing the starter on my '98 LS 400. If it hadn't been for your post I couldn't even have found the starter.
A few tips for the next guy.
1. Have a 14mm flarenut wrench, the fuel line nut is soft and will round off with an open end.
2. Consider taking the top and fuel rails off the manifold. I didn't and it is difficult to horse the manifold off and on with all the stuff in the way. I am a big guy and managed with some difficulty. If you are smaller, have a helper or take it apart. The gasket sets come with the required gasket.
3. Have universal joints for your socket sets, and a good magnet pickup tool. You'll need them especially if you don't take the manifold apart.
4. Don't worry too much about all the electrical and vacuum connections you have to disconnect. All the electrical connectors are different so it only goes together one way. The vacuum lines fall right back into place if you only disconnect one end. Make sure they are disconnected though. I broke one nipple off and had to repair with a brass fitting.
My car was out of service for about two weeks. Most of that time was researching and ordering parts and waiting for them to come. I think if you are young and have a strong back you could change the starter in eight hours with all parts available.
Regards, Ed
PS: I bought the starter from Advance Auto Parts web site, $149.95 plus core. Came in About 4 days and I returned the core at my local Advance for instant credit with no shipping required.
Hi Ed I am not young but have a strong back and have to do the dirty deed. Just wondered after you removed the intake and everything hooked to it, how long before the starter was removed. Thanks in advance.
-
Had my 95 on the highway for a rip, really impressed. I had my ls for about 6 months now and knew it was a real nice ride on the highway. This week I took it out on a section of new pavement and stomped her down. Once up over 85 to 95 things really started to happen, I was sunk back in the seat and was real impressed when it didn't shift the last time until right around 125. Driving just as smooth and quiet as could be. As far as I know these cars have a lock up torque converter and that is what happened at that speed but it certainly was still pulling good. I have seen several articles where they say the top speed for this car is 149 and after this experienceI can beleive that. Although I know this is totally illegal and would not suggest it I had to let off at that point but am going to put it to the limit in the near future. I certainly realize these cars were not made for this kind of driving. Whatever I drive I like to know what it will do, not like the guy with the new porche who will never know what happens if he holds his right foot down.
-
And the LS is back in action once again...
Hello Grand ls read all of your posts about the starter job with great interest. I have a 95 that is starting to be a clicker. I saw in one of the posts that there was a recall on the 95 which mine is. Curious as to how many times yours clicked before the final click or did you replace the starter after the first click? I am guessing the gaskets needed would be the same for the 95 model, although I did notice a couple of small things different under the hood in some of the pics you posted. Mine has 130k. Doesn't look like much fun, especially if something is broken during disassembly. Plus I know it is going to be hard to reach in there cause I am quite short. Trying to find some info on a recall, gee you think they would install too. Any answers would be greatly apperciated, my babay is hurting. Thanks.
-
This ABS bleeding procedure is for another make of car, but it's basically the same for your Lexus.
Read this> http://dodgeram.org/tech/repair/Brakes/beeding.htm
Do you have any idea where I might find rear antilock valve, combination valve? I think the front antilock valve is the one with all the lines going to it under the hood.
-
I recently had a rear brake line go bad on my 93es. After replacing the line, bleeding all 4 wheels. The pedal still goes down much further than it used to. After a few pumps it comes up almost normal but still not the same as they were before the line replacement. All suggestions appreciated.
You still have air in your brake system. Did you use a power bleeder, or if not, did you bleed the brakes in the proper sequence?
I used a one man bleeder and didn't know there was a proper sequence. The right rear was the problem, so I blead rr then lr. After I still had air in the systemI did both front. Have used this procedure on many vehicles over the years and never had a problem. However this is my first with abs if that makes a difference.
-
I recently had a rear brake line go bad on my 93es. After replacing the line, bleeding all 4 wheels. The pedal still goes down much further than it used to. After a few pumps it comes up almost normal but still not the same as they were before the line replacement. All suggestions appreciated.
-
I have a 93 300. All was fine for the last year now all of a sudden something is killing my battery with everything turned off. Anyone ever had this problem on an early ES model? Battery is just a year old and will hold a charge if left disconnected. Thanks for any replies in advance.
Never had this issue with my old-school 98 but I know there is a way to see what is draining the battery; just can't remember.
Maybe a search. I will look since I would like to know and help ya out.
I fully charged the battery and it will stay fully charged but will only last a few days when hooked up. I have a volt meter, just not sure how to check how much drain is coming out of it., car is charging great when running.
-
I have a 93 300. All was fine for the last year now all of a sudden something is killing my battery with everything turned off. Anyone ever had this problem on an early ES model? Battery is just a year old and will hold a charge if left disconnected. Thanks for any replies in advance.
-
Running, operating temp, shift slowly from park thru all gears ending back in park. Remove, wipe off and reinset the dipstick 5 times before attempting to read it. Level should be WITHIN the Hot range. "Operating Temp" = car has been driven at least 15 minutes
Thanks very much Monarch appreciate that.
-
Just wondered if anyone can tell me the proper way to check the transmission fluid in the 95ls. Manual doesn't say anything about checking the transmission fluid. I know there is a cold and hot marking on the stick. As far as I can figure the cold is just a reference mark. Is it best to leave it running at operating temperature and check in park? I find it really hard to get consistent readings, one side of the stick reads different than the other. I do realize it holds 8.2 liters empty. Flushed mine and added around 8.5 liters and seems to be as close as I can get to between the high and low levels at operating temperature. All advice is appreciated.
-
modding the LS the way it should be modded. Classy, ( NO GHETTO )
Ditto to that.
Love the 20inch rims everything about the car and especially the photography skills which are a big part of these shots. I like the fountain and hard rock cafe back drops best.
-
You don't adjust the idle on an EFI car. They'll idle at whatever the ECU wants them to idle at & any "adjustments" that can be performaned are mostly irrelevant. The ECU will still run at whatever it wants to run at.
Start by taking the IAC valve (EGR Valve & Throttle plate - for that matter the entire upper intake manifold) off & cleaning it. Then check for vacuum leaks on your hoses.
IAC valve sticking is the common cause.
I know on the honda accord 2 liter fuel injection you can set the idle.
-
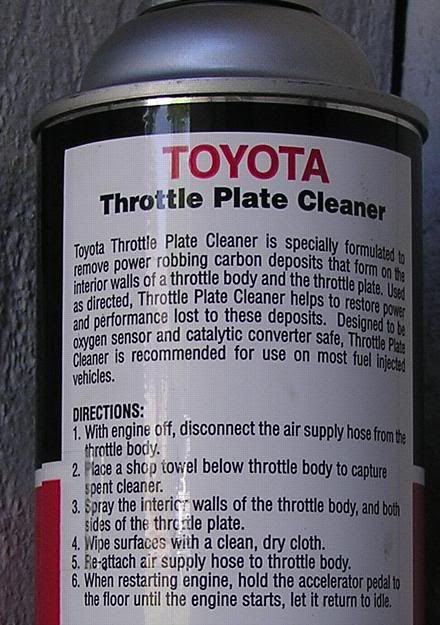
Available at your local Toyota dealer Part's Dept http://i5.photobucket.com/albums/y189/mastertech/tbclean.jpg
:whistles:
or any other throttle body cleaner (ie. CRC) for that matter, just make sure it says "safe for O2 sensors" on the side of the can.
steviej
Is there any tutorial on this subject on this site anywhere, throttle body cleaning. Thanks for the onfo guys.
-
I am new to the forum, have a 93 es300. Seems to idle real slow when warm, works great other than that. Wonder if anyone could give me some info on how to adjust the idle up a bit. Runs around 500rpm at idle and when in drive is to low for me. Thanks
-
n:
I was wondering...where is this rubber coming from? Would it be in the rack, and taken as an indication the rack is worn pretty badly internally??
I doubt it's coming from the rack.
I believe the rubber is being shed by the pump rotor and housing inside the P/S Pump. The pump is known as a "vane" style because it has metal vanes that are held in place by a rotor. These parts are the main components of the pump. The rotor is round and has slots cut in the outer circumference of it. The metal vanes ride in these slots. The rotor is (center) shaft driven and it sits in an oblong/elipsoidal (not perfectly round) cavity inside the pump. As the shaft turns the rotor, the vanes move outward due to centrifugal force until they hit the wall of the cavity. This is where the fluid enters the pump from the reservoir. As the shaft continues to turn the rotor, the vanes are forced inward by the wall of the cavity due to the fact that the wall is getting closer to the rotor. Fluid is forced through the ever decreasing cavity size & high pressure pumping is achieved. I'm not cetain now, but I believe either the slots and/or the cavity is rubber lined.
It is the vanes moving in & out in the slots that wears rubber off from either the rotor and/or the cavity. Also, in Lex's tutorial, he mentions the poor condition of the O-rings & it may very well be that is where the majority of the rubber contaminants are coming from. He did a great job with the tutorial & the pictures in particular;
While the pump itself may have deteriorating rubber parts, which is mainly the o-rings and bearing seals, the rotor, and pump cavity is all metal (having opened more than a couple of these pumps). Realize that there is fair bit of rubber tubing in the system and there's fluid swirling thru those tubes as pretty high pressure, as one would observe when flushing the PS Fluid. So there's plenty of oppty for inner linings to erode away. The solenoid screen is the first filter on the return line.
And for a total of 4 cents, in response to lexlover's request: in fact threadcutter is a proponent of removing the screen and flushing, which probably is fine. I generally clean the screen, reinstall it then flush because I am curious what's circulating in there. After a good flush, clean screen and reinstall again and flush only about 1 qt worth for final rinse. The link in TC's post for PSflush is great -- I wouldn't flush at the solenoid: you'd have better control at the reservoir and the return line there. For another DIY on this topic, see Soarer)
n:
Thank you very much rtd111 really appreciate the link. Hope the fluid will be real clean this weekend, smells quite burnt and it is brown.
I was wondering...where is this rubber coming from? Would it be in the rack, and taken as an indication the rack is worn pretty badly internally??
I doubt it's coming from the rack.
I believe the rubber is being shed by the pump rotor and housing inside the P/S Pump. The pump is known as a "vane" style because it has metal vanes that are held in place by a rotor. These parts are the main components of the pump. The rotor is round and has slots cut in the outer circumference of it. The metal vanes ride in these slots. The rotor is (center) shaft driven and it sits in an oblong/elipsoidal (not perfectly round) cavity inside the pump. As the shaft turns the rotor, the vanes move outward due to centrifugal force until they hit the wall of the cavity. This is where the fluid enters the pump from the reservoir. As the shaft continues to turn the rotor, the vanes are forced inward by the wall of the cavity due to the fact that the wall is getting closer to the rotor. Fluid is forced through the ever decreasing cavity size & high pressure pumping is achieved. I'm not cetain now, but I believe either the slots and/or the cavity is rubber lined.
It is the vanes moving in & out in the slots that wears rubber off from either the rotor and/or the cavity. Also, in Lex's tutorial, he mentions the poor condition of the O-rings & it may very well be that is where the majority of the rubber contaminants are coming from. He did a great job with the tutorial & the pictures in particular;
While the pump itself may have deteriorating rubber parts, which is mainly the o-rings and bearing seals, the rotor, and pump cavity is all metal (having opened more than a couple of these pumps). Realize that there is fair bit of rubber tubing in the system and there's fluid swirling thru those tubes as pretty high pressure, as one would observe when flushing the PS Fluid. So there's plenty of oppty for inner linings to erode away. The solenoid screen is the first filter on the return line.
And for a total of 4 cents, in response to lexlover's request: in fact threadcutter is a proponent of removing the screen and flushing, which probably is fine. I generally clean the screen, reinstall it then flush because I am curious what's circulating in there. After a good flush, clean screen and reinstall again and flush only about 1 qt worth for final rinse. The link in TC's post for PSflush is great -- I wouldn't flush at the solenoid: you'd have better control at the reservoir and the return line there. For another DIY on this topic, see Soarer)
n:
I was wondering...where is this rubber coming from? Would it be in the rack, and taken as an indication the rack is worn pretty badly internally??
I doubt it's coming from the rack.
I believe the rubber is being shed by the pump rotor and housing inside the P/S Pump. The pump is known as a "vane" style because it has metal vanes that are held in place by a rotor. These parts are the main components of the pump. The rotor is round and has slots cut in the outer circumference of it. The metal vanes ride in these slots. The rotor is (center) shaft driven and it sits in an oblong/elipsoidal (not perfectly round) cavity inside the pump. As the shaft turns the rotor, the vanes move outward due to centrifugal force until they hit the wall of the cavity. This is where the fluid enters the pump from the reservoir. As the shaft continues to turn the rotor, the vanes are forced inward by the wall of the cavity due to the fact that the wall is getting closer to the rotor. Fluid is forced through the ever decreasing cavity size & high pressure pumping is achieved. I'm not cetain now, but I believe either the slots and/or the cavity is rubber lined.
It is the vanes moving in & out in the slots that wears rubber off from either the rotor and/or the cavity. Also, in Lex's tutorial, he mentions the poor condition of the O-rings & it may very well be that is where the majority of the rubber contaminants are coming from. He did a great job with the tutorial & the pictures in particular;
While the pump itself may have deteriorating rubber parts, which is mainly the o-rings and bearing seals, the rotor, and pump cavity is all metal (having opened more than a couple of these pumps). Realize that there is fair bit of rubber tubing in the system and there's fluid swirling thru those tubes as pretty high pressure, as one would observe when flushing the PS Fluid. So there's plenty of oppty for inner linings to erode away. The solenoid screen is the first filter on the return line.
And for a total of 4 cents, in response to lexlover's request: in fact threadcutter is a proponent of removing the screen and flushing, which probably is fine. I generally clean the screen, reinstall it then flush because I am curious what's circulating in there. After a good flush, clean screen and reinstall again and flush only about 1 qt worth for final rinse. The link in TC's post for PSflush is great -- I wouldn't flush at the solenoid: you'd have better control at the reservoir and the return line there. For another DIY on this topic, see Soarer)
-
Surely you jest!
New to the forum, just bought my 95 LS a few days ago. Great forum by the way. Have been reading everything I can about the good and bad points of the ls and came to the conclusion the power steering is the weakest link. Have read all of the posts I can find about flushing the system. Saw all of the pictures of the solenoid with the tiny screen in the end. Never attempted it yet but I beleive from what I have seen I will be able to remove it. My question is after I remove the solenoid, is that where I drain the system from? Figure with that off the fluid will flow from there if the wheels are turned. If the reservoir is attended and kept full, should be able to keep the fluid flowing until the fluid is coming out clean without letting any air into the system. I might be totally wrong but any info would definitly be appreciated. Thanks in advance.


No Start After Storage
in 90 - 00 Lexus LS400
Posted
Hi guys I have a 95 ls which has been in storage for about a year now. Fuel was stabalized and all was well when parked.
Tried today, rolls over great battery is fully charged. Not a chance of a kick or any sign of the engine starting. I also have an es 300
sitting beside it in the same conditions and it fired fine.
Can anyone please give me a few pointers on where to start looking for my problem. Thanks