techFiend
-
Posts
1 -
Joined
-
Last visited
techFiend's Achievements
")


-
1999 Rx300 Door Lock Actuator Repair Less Than $15
techFiend replied to indiana's topic in 99 - 03 Lexus RX300
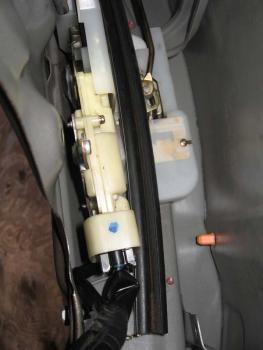
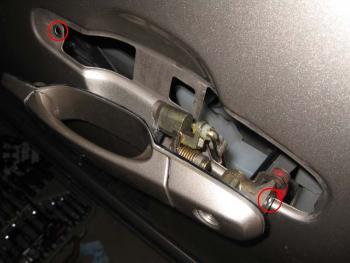
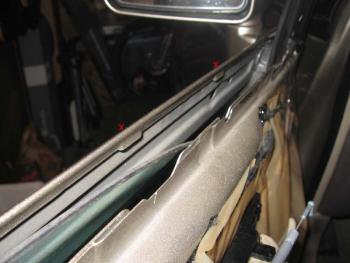
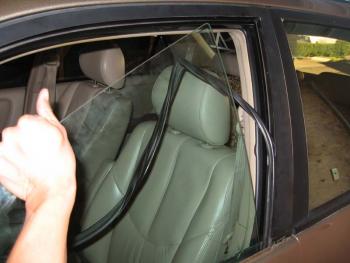
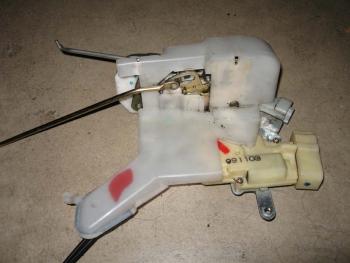
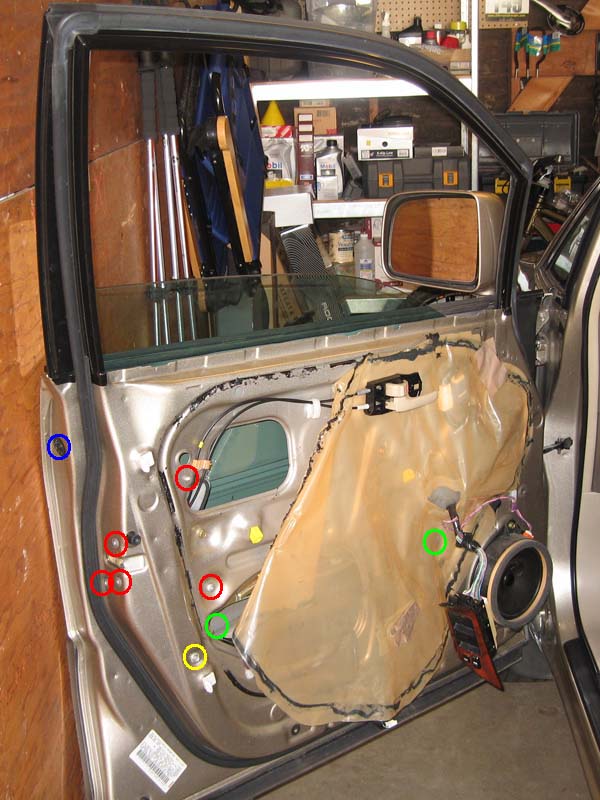
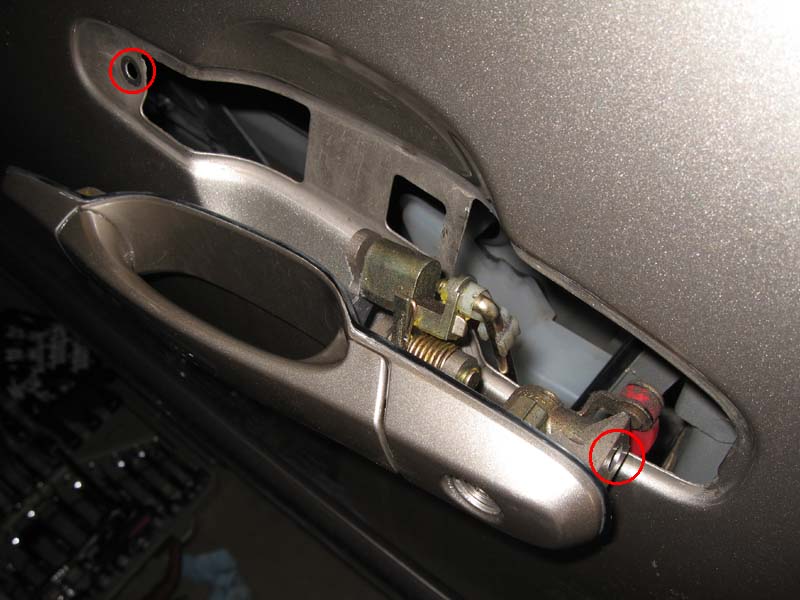
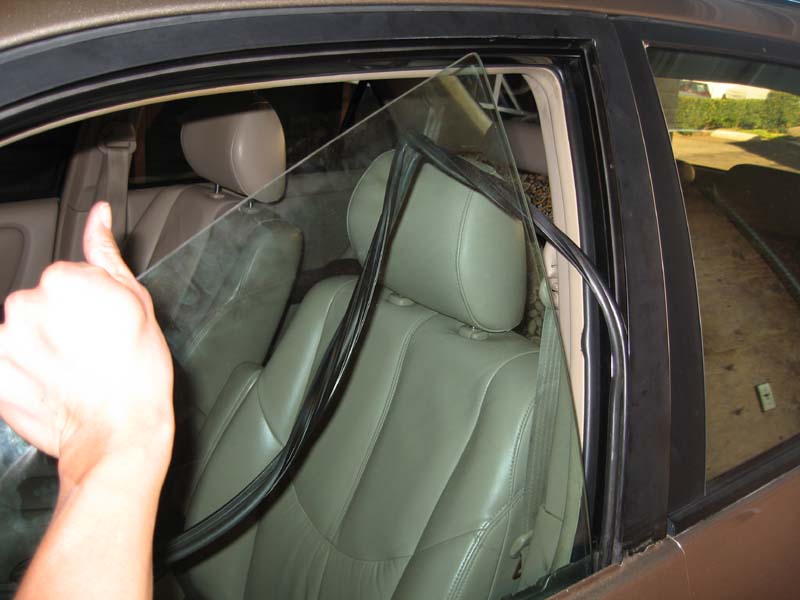
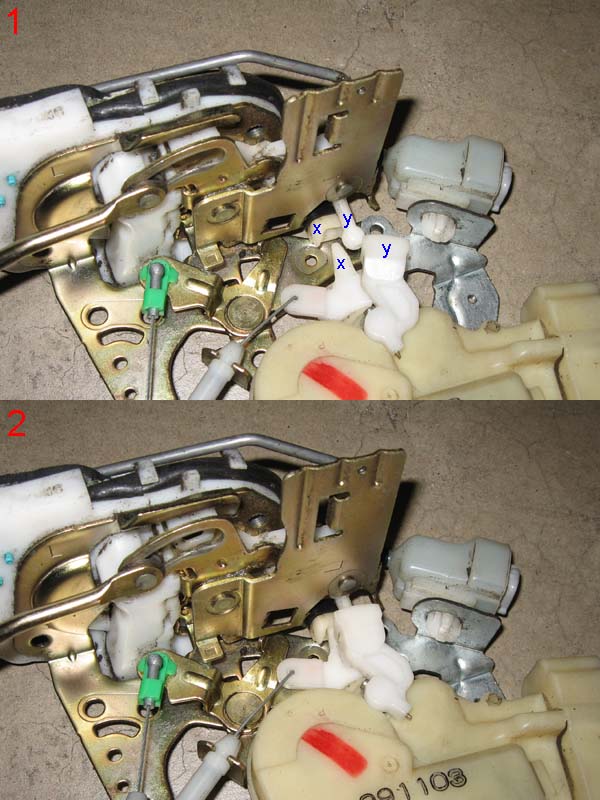
Please excuse my first post. My 2000 RX300 had the driver's side door lock actuator fail. I could lock the door manually using the key as well as the lock on the inside handle, but not with the key fob or the door lock button on the power window switch panel. Basically, the motor driving the lock was busted. I was trying to get to that motor to see if I could replace it BEFORE I saw this thread. To cut a long story short, I found a way to get to the door lock before realizing that I could not replace it for less than $250. I've since put everything back together and reverted back to using the key. The upside to all this was I had some photos which may be of use to others attempting work on their door lock. These photos are from the front driver's side. I understand the rear doors to be slightly different. I am not a certified mechanic, so I don't guarantee that your experience will be the same. Here are the important screws: circled RED = door lock screws, 4xT30 and 1 plastic push pin circled BLUE = outside door handle screws, 2x10mm bolt (I think), the other blue circle is on the door exterior circled GREEN = window glass bolts, 2x10mm circled YELLOW = rear lower frame bolt, 1x10m, rear lower frame is the vertical track on which the wondow glass runs Here is a view of the door lock that I was trying to get to. It sits behind the rear lower frame (the track with the black rubber strip that the window glass glides on). Space is tight. The rear lower frame has to come off before the door lock can be removed. The window glass had to come out for me to get space in there, as well as remove the rear lower frame. With the glass fully down, I started removing the door belt molding. That was the most painful part. There were 6 "hooks" (marked with red x) that made it challenging. In retrospect, I could have removed the glass without removing this moulding. I wasn't sure when I started and was just being careful. Then I raised the window glass up until the 2 bolts at the bottom (see green circles in first picture) were accessible. Before anything else, I disconnected the power window panel and the big connector to the door lock to make sure that nothing moved when my hands were in there. There was one other smaller connector on the door lock which I could not remove - it was difficult to get a grip on it. Once the bolts holding the glass came off (you will have to push the rail on the regulator slightly to get it out of the way), all I had to do was lift the glass up and rotate it out. I thought the rubber seal had to come off to get the glass out, but that was not necessary. With the glass out, I removed the outside door handle to disconnect the door lock from the handle. To get the plastic clips off the metal rods, push on them hard enough to disengage the clip. Remove the bolt holding the rear lower frame and slide it out. Then remove the 4 T30 screws holding the door lock and rotate the lock out. Here is the door lock. If you ever take the door lock apart, be careful putting it back. There are a couple of parts which have to match up (marked x and y below). x is the mechanical door lock. It hooks up with the internal lock and the metal rod connecting to the door handle. y is the one that is controlled to the motor. Be careful with the rear lower frame during re-installation. There is a tab on the end without the screw, and that tab has to sit correctly in the matching frame on the door.