
Oregon John
-
Posts
5 -
Joined
-
Last visited
Content Type
Profiles
Forums
Events
Gallery
Store
Articles
Videos
News & Articles
Everything posted by Oregon John
-
ABSOLUTELY!! Believe the manual when it says X number of miles OR Y number of years. Rubber deteriorates just with TIME. It's a do-able job for the home mechanic - see my suggestions elsewhere in this forum - BUT I advise also taking the manual's suggestion and using the special Toyota sealant. It's horrible expensive, over $100 retail, so I just used my old favorite here in my shop. It started leaking a month later and almost wrecked the motor, since we seldom see critical temp until it's too late.
-
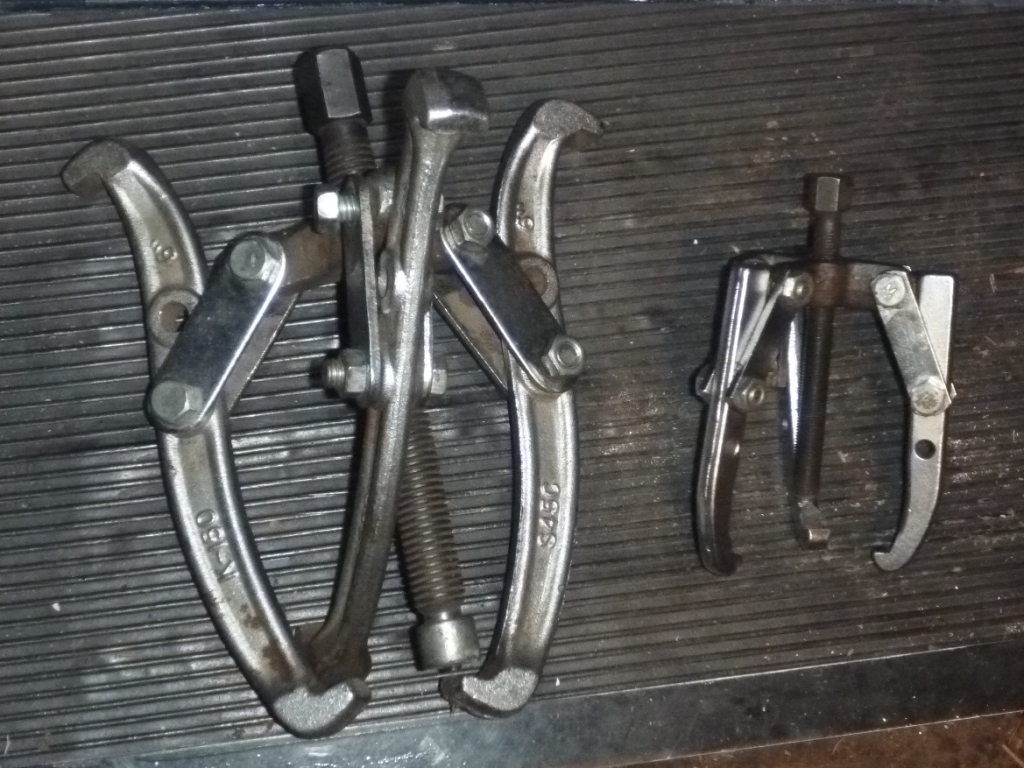
Odd front end noises when driving often lead to the need to replace wheel bearings. This can be a humming noise at speed, and more often upon turning the steering wheel a bit; the usual road noise changes. Hopefully it hasn't gone on long enough to have a grinding effect. I noticed a humming noise in my car at 98k miles. This seemed a little early - my Toyota pickup has never had any attention to its bearings at 285K and still rolls neatly down the road. I actually had an experienced Lexus repair evaluate it, too, and they agreed in fact that both sides were worn. Lexus here wanted $850 to do both bearings [together]. The DIY cost was $140. It takes medium mechanical ability. I decided to do the job myself, and eventually found that both sides still had lube in them. My guess is that the bearings would still soldier on for another thousand miles at least. But in order to really inspect the bearings, you have to open them up and destroy them. So I opened the Lexus shop manual and got started. Note that these instructions are pretty similar for other Lexus models which don't have front wheel drive, and other manufacturers' as well. The manual's listing of SST [special tools] is daunting but unnecessary; I accomplished the task with two 3-legged pullers, although I did use a machine shop's hydraulic press services since my wimpy 6-ton job would not do it. Also, the manual omitted some vital advice. After the car is up on jackstands and the front wheels removed and marked as to left and right [from the driver's perspective], remove the front brake caliper as usual by taking out the two bolts and using a rope or wire to hang the caliper up out of the way. Important: Use a 6-point 17mm socket for this, and all subsequent nuts and bolts [not a 12-point]. You are overcoming 83 ft. lbs. of torque in some cases, and twelve-pointers will slip and round bolt corners. Remove the rotor. Next pull the top steering knuckle after removing the clip and unscrewing the castle nut until the bottom is even with the bolt end. I used a small puller and it popped right off. You also need to remove the little speed sensor wire from the hub. All that's left are the two bolts that secure the unit to the lower ball joint. Use a long socket handle - these are tight. The book gives instructions to mount the hub assembly in a vice using 3 of the lug nuts and not tightening too much. Good idea, but of course it's not possible to then use a really long socket handle [36mm or 1-7/16" socket] to remove the big nut in back [visible after removing the dust cap]. You are undoing more than150 ft. lbs. torque. So the other main tool you need is a GOOD air impact wrench. I use an Ingersall Rand 1/2" one with 90 pounds of air. Set it on high and the nut comes off. You did use a punch and tap out the staked part first, didn't you? Lexus says this nut is to be renewed, but I re-used mine easily - re-staking is not hard. Now remove the skid control rotor [it looks like a gear] and remove the four 6mm bolts that hold on the dust cover. My larger 3-jawed puller then fitted over the spindle and was able to pull the unit apart WITH the air wrench. It comes apart very slowly, even with that tool. The inner bearing race is left, and my small puller again did the job with the air wrench. Note that I had to heat one of the races with a propane torch first. Pop out the grease seal, then remove the large snap ring. I used the Harbor Freight snap ring set #60593, but first reversed the tips, left to right etc. so that they pointed inward. Now the bearing is ready to be extracted. I took it to a machine shop and their 80 ton press! Now do an important thing; the manual suggests this AFTER assembly, but if you have a problem, the spindle can be replaced before this. Check the run-out of the hub face where the wheel studs are mounted. You'll might just get the machine shop to do it, but if you have a gauge you can do it yourself. The hardest part is mounting the spindle in something so it can rotate without wobbling. I found it best to make a hole and stick the thing in it upside down, then rotate it carefully. The gauge shouldn't deviate more than .002 inches according to the manual. Now replace the snap ring and put in a new seal, then grease it. The machine shop can now put the spindle back in snugly. Back in your shop you can install the big nut and stake it. I found that mounting the unit in a vice by the caliper holes worked well, while anchoring the hub spindle in back. This nut takes 143 ft. lbs., and most of our torque wrenches only go to 100, so..... go borrow or rent a bigger one. The rest of the re-assembly is fairly routine. Make sure the top steering knuckle taper and hole have zero grease on them. And it's advisable to check the car's toe-in after you are done. You can go for a complete alignment, or do as I do and use two long straight sticks and two bricks. The only setting that kills tires is toe-in, and it's easy to check yourself. Adjusting the rods that move the wheel assemblies on this car is easy, too, except the part in which you realize the car front is VERY close to the ground. But you can reach the adjusters from behind the front wheels. Or up on a lift, but that entails many more steps. Parts needed for the job: two bearings and two seals. If you wish to renew the big nuts, you'll probably have to go to Lexus for them.
-
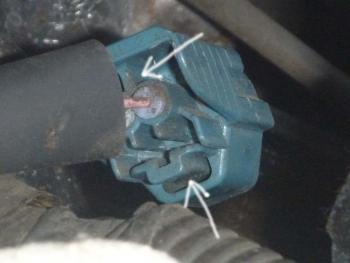
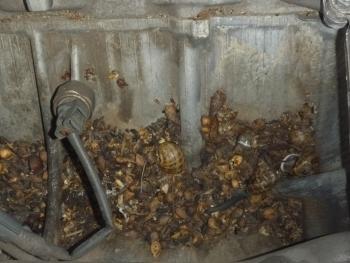
Several posts on this forum have lamented the dearth of instructions for SC430 starter fixing, and Wadenelson's notes plus photos are useful. In particular, his showing the Harbor Freight tool required for just that last actual starter bolt is spot on. But the whole job invites a better outlining, since the factory manuals need elaboration. This is a major undertaking, but can be done by the medium experienced. Much shop time cost can be saved! Removal of the main cover and various hoses plus one electrical connector to the throttle body is normal. One of those hoses is on the underside and most easily unhooked as you are removing the entire assembly. But in the first contrary instruction, it is not necessary to take off the throttle body if you are careful; it can be left on the manifold assembly the entire time. This saves the cost of replacing its gasket. Likewise, do NOT remove the many plenum bolts on top of the manifold assembly unless you somehow want to replace that gasket as well. BTW, I suggest you number the V-bank cover brackets when removing, to correspond to the manual's numbers. Or take a photo of the whole thing from above after removing the big plastic cover.. The main fuel line must be disconnected as instructed, but they do not mention that it's also useful to disconnect it from each side fuel rail; this because the thing juts under the wire harness and won't allow upwards motion of the assembly when you finally take it out. The manual insists on O-gasket replacements for this fuel pipe, see below. There is also a small 6mm bolt way in back of the pipe to remove. As long as we're mentioning the two fuel rails, also refrain from removing the two bolts on each side that hold them [and the injectors] down. The manifold assembly can be removed by swinging it toward the right side [instead of upwards], thus slipping the fuel line out from under the left wire harness. But this is tricky, and extra help is advised - access is very awkward. What really helps is to have removed the right rear engine hoist hook; you will probably never need it, and it can be put back on at a later time. But of course, you have to remove the intake and plenum assembly at least once to get to the bolts holding this item. Now about those fuel injector connections: I hereby place a curse on the Lexus manual editor who, with 4+ inches thick of paper, could not find a way to explain how to disconnect them. Most other connectors on the car come off with some sort of finger pinching. Not the injector ones. I finally found a good way to get them off carefully [Do NOT break one!]. This is best done with [again] Harbor Freight long-nosed large pliers. From the back, insert one jaw into the plastic recesses, and the other under the connector. Squeeze and pull gently. They have tiny wires. I will try to imbed a photo. The manuals do not say, but you will also have to take off the 6mm bolts [using a 10mm socket] that hold down the wire harness, and two more for the part in back. This harness must eventually slip over the left engine lift hook; [left as facing the front of the car, as usual termonology]. There are various hoses to slip off, and nuts and bolts on each side of the manifold as well. Those bolts take the usual 12mm socket, and this is easiest to use. A T40 Torx socket fits in the middle of the bolts, but there's often too much dirt in there, too. I found it a good idea to get out the old air hose and blow off this entire area before taking them off. Not only does it clear out the torx hole, but also removes stuff that might fall into the intake holes later. Then you can also have a shop vac on hand to suck up all the debris that lies under the manifold. Mine included rodent seed storage and snail shells. Prying up the manifold will bring to light several hoses or connectors that you missed. Then you will likely find the connector UNDER the manifold with a 6mm bolt holding on the wire. The assembly is somewhat heavy, and a two person job. OR, do as I did and make a bracket to bolt on the back, then use a hold down strap between that and the hood catch. Then raising the hood brings up the back of the assembly, and you can just left the front by hand, and swing the thing forwards - over the cardboard protecting piece you laid down. You will want to remove the back coolant crossover, but it's not necessary to do anything with the long front-to-back one which lays between the cylinder banks. The connectors for the starter itself are easy, except the main positive lead, which can come off after you loosen the starter. I never did disconnect the battery cable itself from the battery. You can leave it on if you're careful - I suggest at least covering the positive terminal with a cloth. Otherwise, it's major spark time. The left starter bolt [remove it first] is very hard to reach with a tool, although once started with the ratchet mentioned above, you can just use your fingers. Putting it back later was not as hard, but I suggest you install the right bolt first. Now about the starter itself: They are very robust, except for the two brass solenoid contacts. My local starter fixer declared the rest of the starter bullet proof, and just replaced those contacts. This has an ancient heritage: I worked on solenoid contacts 50 years ago. Before reassembly: you will want to go get the necessary gaskets, which include the intake manifold ones and the two for the coolant crossover pipe; these can come from a regular auto parts store. Also get the one for the throttle body if you removed it. Now comes, if you removed the fuel connector, an annoying trip to your Lexus or Toyota dealer to replace the little crush washers that fit around the fuel pipe fittings to the injection rails. I did later find them online, but oddly more costly. At least it saves you some trips to the dealer's. You'll need two each of #23232-41081 and 90430-12026. This latter one especially is annoying for just a small washer, but consider that it holds back 40 pounds or so of fuel pressure.... It's nice to have the correct part. And yes I know it's tempting to re-use the old ones, which may or not work. DO attach the positive cable to the starter before putting it in place. DO install the fuel line [if removed from the fuel rails] just as you have the manifold assembly hovering almost in place; this line needs to be routed carefully in back as well as UNDER the wiring harness. If you don't follow this, and start bolting the manifold down before the fuel line, you'll just have to pry the whole thing up again. Other than that, reassembly is pretty easy. For working on a Lexus, I like to have a small 1/4" drive torque wrench, but a regular one will do. The two fuel pressure units that use the above mentioned crush washers want to be torqued in place, but obviously no socket will work. The hex under the bulbous part is US 7/8" and I guess you could estimate it, but it also works well to use a crowfoot to torque them. The mainfold bolts are more easily inserted into place using one of those small telescoping magnets. Don't forget to put the coolant back in before trying out your repair. And watch out for two of the hoses that connect to the throttle body. These carry coolant and if they come loose later, you'll have a nasty surprise. I did!
-
Bruce- I can't think of any reason for a repairer to access the hood latch system in this case. For a fix, I suggest first getting your head under the dash and inspecting the release handle. Then seeing if there's any way to remove the grill from the front [this will allow manual latch release]. As a next resort, crawl under the front of the car, remove the bottom engine cover [~15 screws] and look at the cable, but it's unlikely anything would be apparent. Last resort is the dealer, but note that they may have a quick fix!
-
Doing the timing belt on my SC430 [2003] took much longer than with lesser cars, but was worth the savings. I'm not going to address IF you should do it, just my experience with one. I have worked on cars for many years. NOTE that a number of things did not conform to the Lexus manual. PLUS I made a tool to remove the crank bolt easily, for $15. More in a bit. First: It is not necessary to remove these items that the book thinks you have to: vane pump which is horrible to get off, so don't. [but do take off the pulley] -- The AC compressor - just remove the lower bolt and loosen the top one. -- the crank position sensor [leave it alone] -- the RH belt pully can stay; it just tilts back anyway. -- Furthermore, it is not necessary to use a special tool [sST] to remove the old timing belt. Just remove the tensioner [2 bolts]. You likely want to replace this anyway - check the specs on how much pin is showing. Likewise on putting in the new belt - just put in the tensioner last. -- For new belt, set the two cam gears as per book, i.e. slightly rotated. Watch out for the positioning of the various dust shields, and which goes in front of what. It's easy to lose track of this and the book is not clear. Removing the crankshaft bolt can be difficult; even my excellent Ingersoll Rand impact wrench couldn't budge it. The SST is expensive. Instead, I bought a 2 inch wide flat metal bar, 3/16" thick, from the hardware store. Length is not vital, and I left mine three feet long. I bored three holes in one end. Two small ones [big enough to admit the 8mm bolts that fit the pulley*] are not so hard. But the center one that admits the 7/8" socket is bigger than most guys can do at home with this thick steel. Mine was 1-3/8" so I paid a friend who has a mini-machine shop in his garage to do it. Measure your pulley well for the center-to-center figures. For the removal of the big bolt, I pointed the long bar up at an angle, and had it rest against a 2x4 I had laid on top of the motor. The I used a 5 foot cheater pipe on the 7/8" socket, and it came off without a whimper. Same on re-install. BTW, get this bolt off BEFORE the old belt removal. * Beware of using 8mm bolts that are too long and interfere in back. I used hardened ones that came with a puller set. Notes on "http://www.shastaanesthesia.com/Lexus/" This site has some good info, including how to open some of the tricky electrical connectors and service limits on the timing belt tensioner [which is in a remote place in the Lexus manual]. BUT - beware of page 10. It wrongly shows photos of the timing belt lined up with the weird "T" marks on the cam gear back plates. This would encourage the repairer to set the belt this way, and that would be wrong. They are correctly lined up with the marks just to the left of those T's. That's why the factory manual never shows it that way [on the T's]. Furthermore, I started to set the timing mark on the crank gear wrong, but was stopped when the marks on the belt itself didn't line up for the cam gear settings. Just above the crank gear there is the correct raised mark, but mine was covered up with old belt dust. Instead, I spotted a casting mark down there that looks like a plus in a circle. I merrily started using it! A wrong move that was corrected by going slowly and watching the belt lines. A major issue with timing belt change is what else to change. You want NOT to get into all this again before the next 90,000 miles has passed, so DO change the water pump, even if the old one looks great. Annoyingly, there is also an O-ring to change [as per book] which is of course not included with the water pump. For the belt rollers, even though they can be had in a kit with the belt, I took the book's advice and left them in since they showed no leakage. Cautious types may elect to change them anyway, but for sure on the second belt change at 180,000 or whenever. I also followed the book and changed my tensioner since the rod was out-of-spec. The serpentine belt can also be changed during this whole operation, too, of course, as well as the radiator hoses. Why? Just to make sure they don't fail during your morning commute or on a trip. I'm not sure why Lexus didn't use hydraulic valve lifters, but with the SC430 they're manually set with metal discs as commonly done in cars these days, and it's a good idea to check your valves when doing the belt. Do it before belt removal. That said, it's a nuisance to take off the valve covers, especially the right one. The battery has to come out [to remove spark plug coil #8], plus even after loosening the wire harness hold-downs, it's still a wrestling match. Then the final touch was that I accidentaly popped off an electrical connector - the one that controls the cam oiler solenoid. Great - this puts the entire motor in jeapardy! You can't really repair this - the connector doesn't come apart intact. This all was followed by a 1-1/2 DAY debacle to fix my boo-boo. Lexus can order the part, but clips come separately. I ended up in a wrecking yard finding a close connector, then modifying it with a Dremel, then trying to figure which wire went where..... etc. Oh, and changing the valve discs if necessary is another nuisance yet, but luckily mine were OK.