Leaderboard

Popular Content
Showing content with the highest reputation on 04/13/2013 in all areas
-
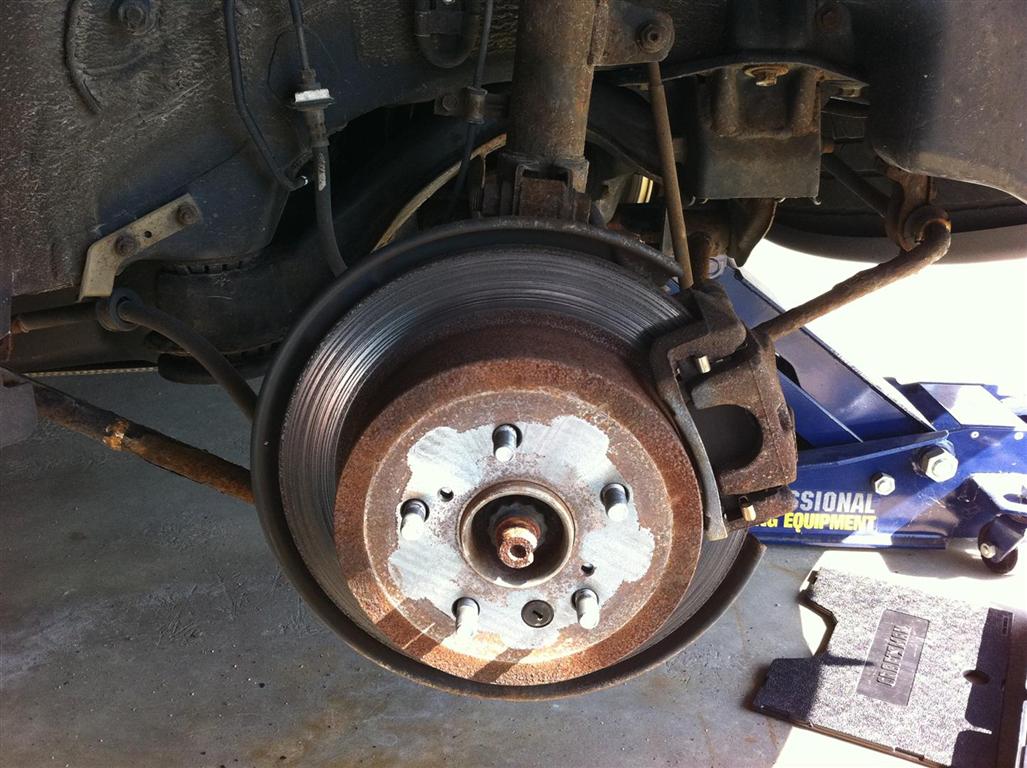
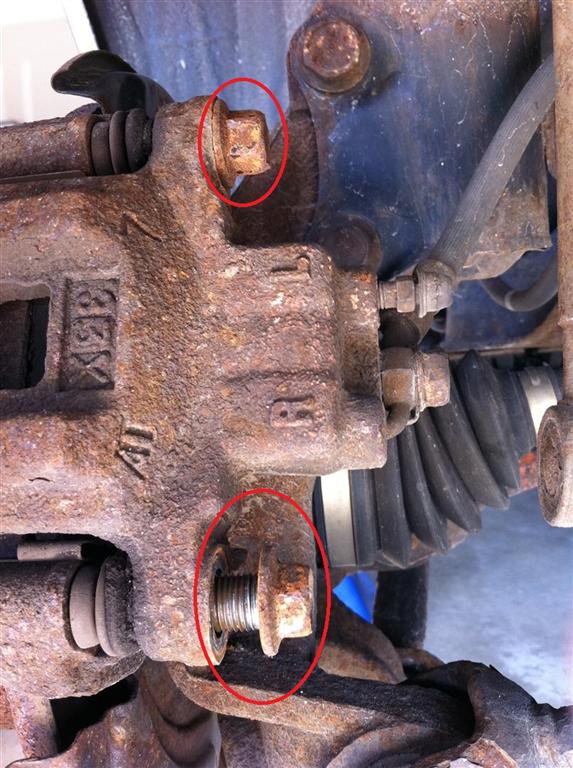
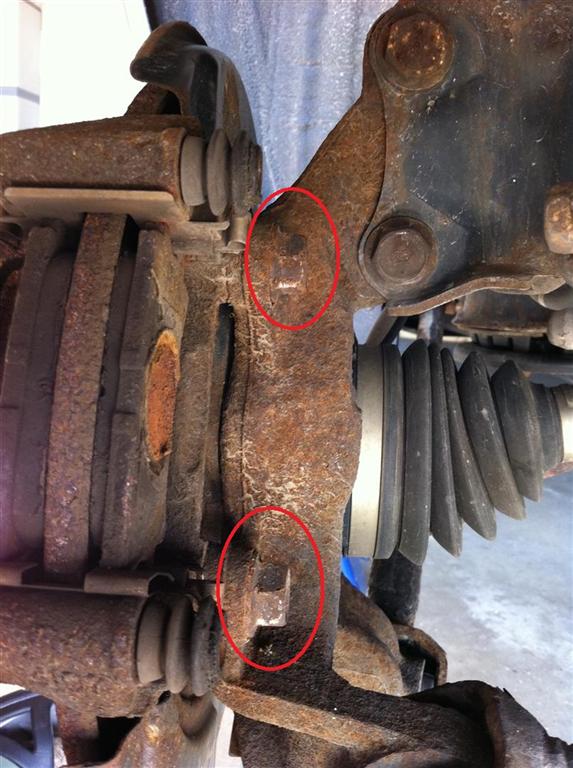
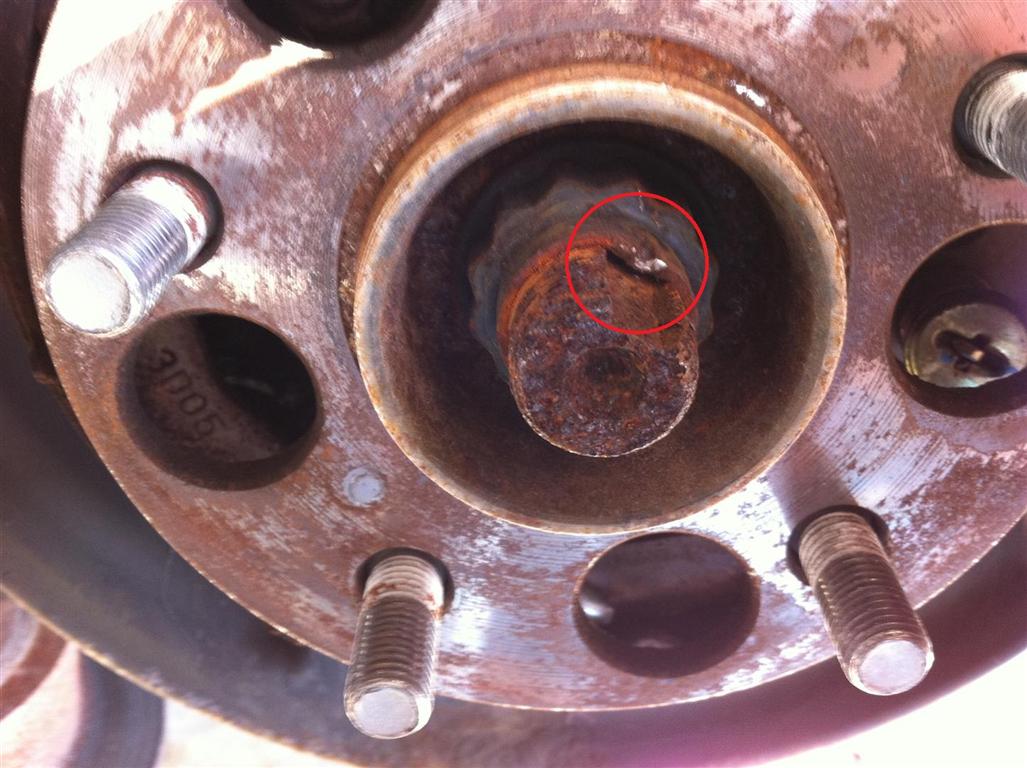
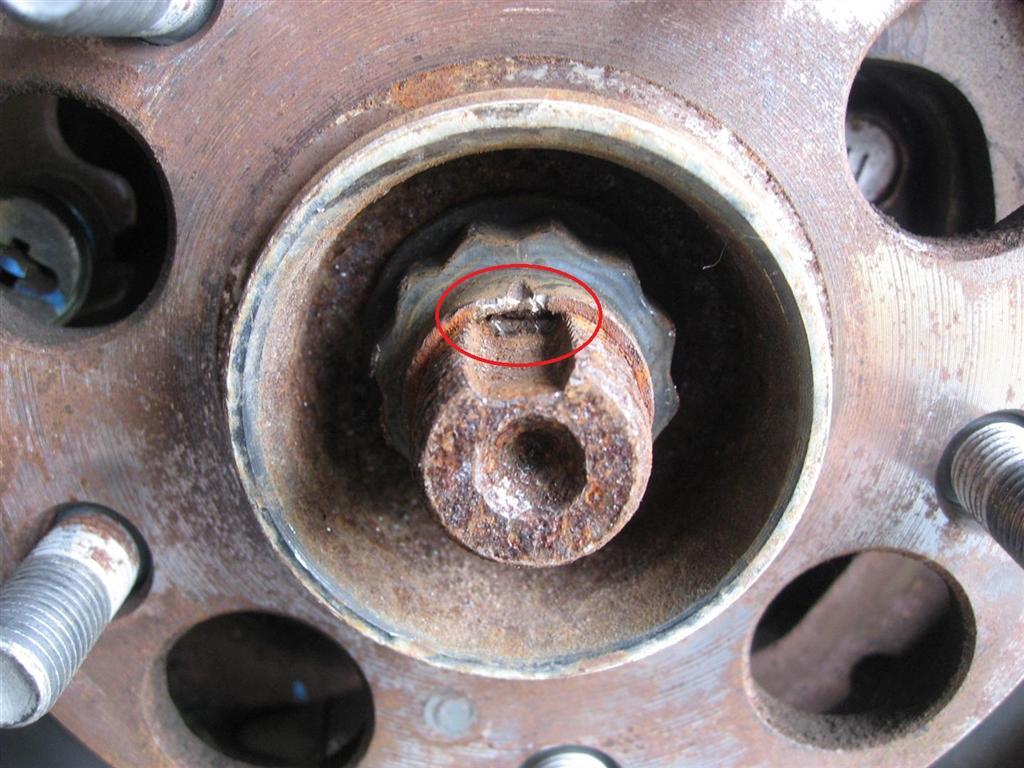
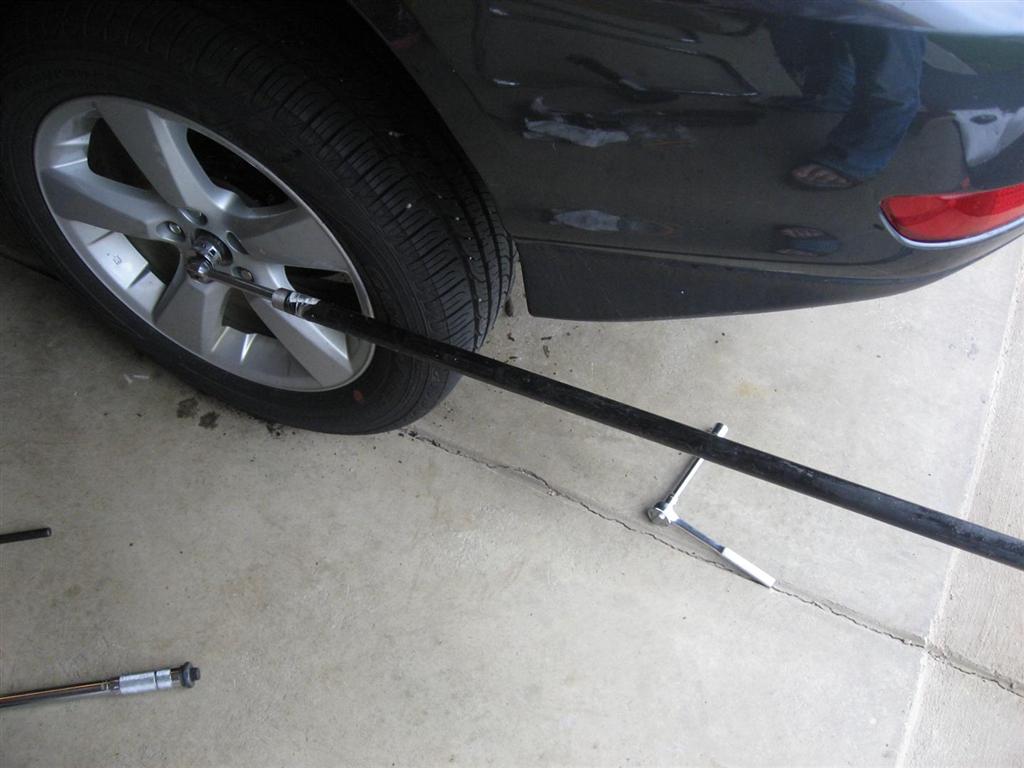
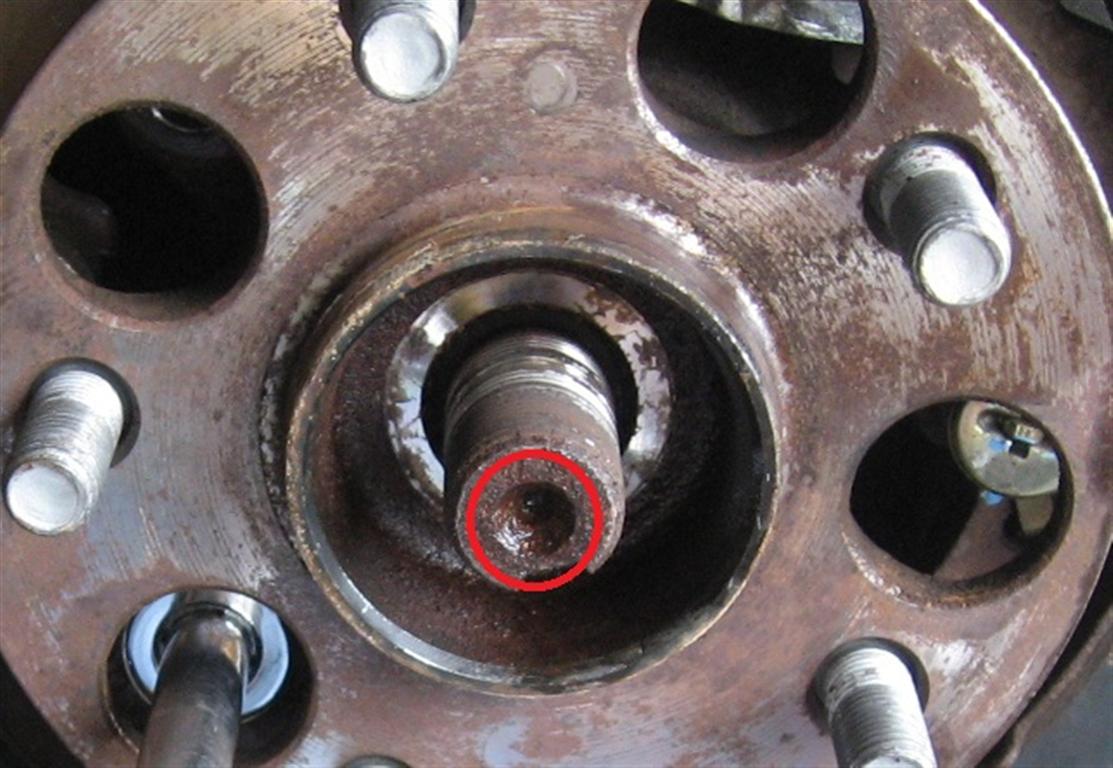
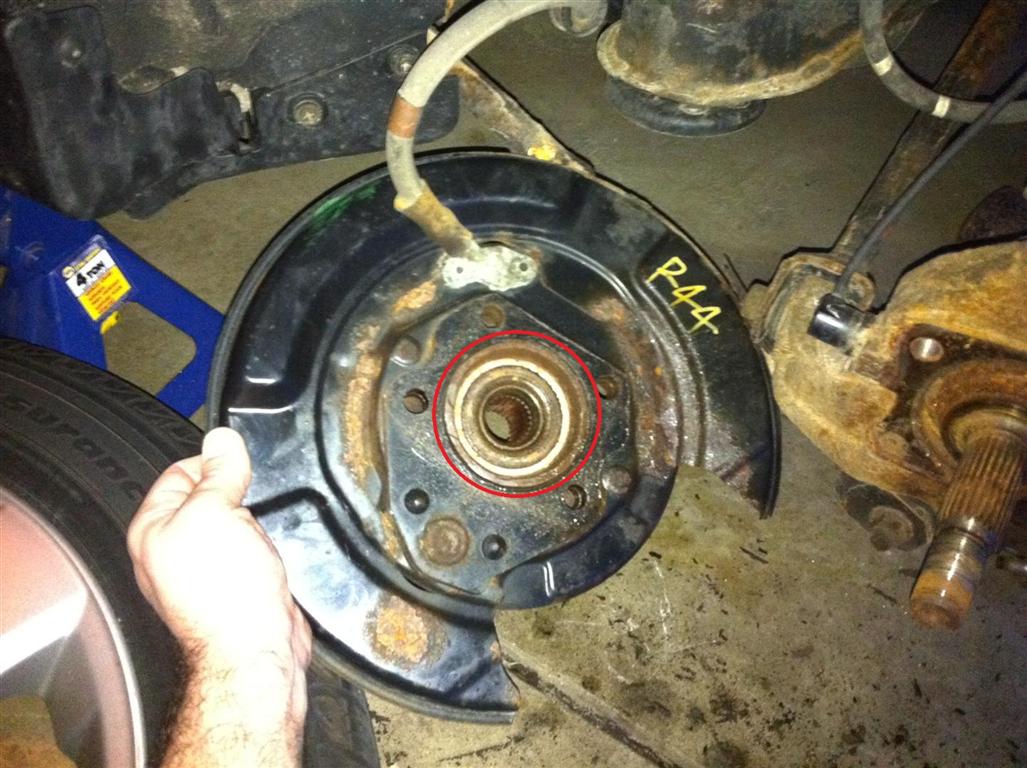
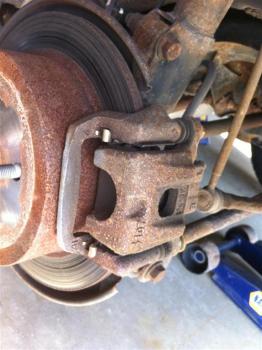
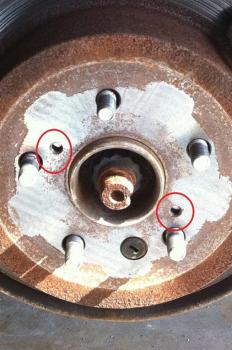
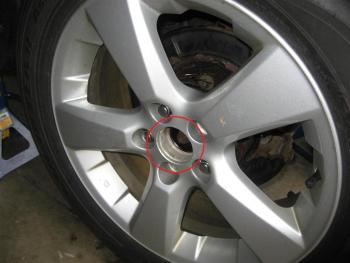
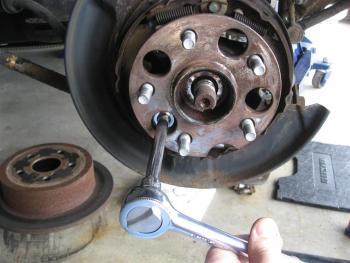
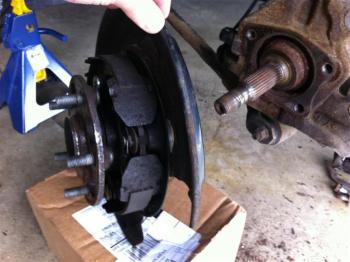
I put together this to help anyone trying to do this on their own. I just got done replacing my left rear bearing assembly on my 2004 RX330. I make the assumption if you are doing this you can at least take off your tire, caliper and rotor. I am not a mechanic by trade, but can do many of my own repairs. Some of the names of the parts I refer to may not be exact, but I will describe them as best as I can. I had some tips on this from my buddy, who is a former Lexus master mechanic. So props to Ron for the help! Some tools I would recommend having before you start: 1. 32mm 12 point deep well socket 2. Ball peen hammer 3. Large heavy hammer, such as a 3lb steel mallet. 4. A small chisel, strong flathead screwdriver or metal starter punch. 5. Hex head 8mm -- 1 25 x 50 mm bolt. Here is the part I am replacing. The specific one I purchased was the Koyo W0133-1890398, which is an OEM part. I would recommend getting OEM parts if you can afford the cost difference. Update: For all who have asked, the vehicle used in this tutorial is AWD (All Wheel Drive). http://www.partsgeek.com/catalog/2004/lexus/rx330/driveshaft_-ar-_axle/wheel_hub_assembly.html First, take off the tire. Remove the two bolts holding down the brake pads to the caliper. Next, remove the two bolts holding the caliper to the rotor. Now pull off and remove the rotor. If the rotor won't budge and you can't pull it off, you can screw the hex head 8mm -- 1 25 x 50 mm bolt into the front of the rotor in one of the the two holes pictured below. As you screw it in, the rotor will push against the assembly pushing off the rotor. Once the rotor is off, you will see the emergency brake with the hub assembly in the center. You will see a groove in the center of the spindle that is held down by a 12 point nut. The edge of the nut will be slightly bent down into the groove to prevent it from spinning. Using the chisel, screwdriver or punch, you will need to bend this back up so the metal is even with the circular shape of the spindle nut so that it can be unscrewed. Be careful here because you can mess up the threading on the spindle if you don't bend it back well enough. Once you have successfully bent the spindle nut back to the correct shape, stop. Next, remove the center cap on the tire and place the tire back on the hub. Firmly tighten the tire directly to the assembly with 3 or 4 lugnuts, but you won't need it to be completely tightened down. Lower the vehicle down to the ground so that there is only enough weight to prevent the tire from spinning. Do not completely lower the vehicle down. Alternately, you can place a pipe or rod in between the lugnuts and prop it against the wheel well or ground. Basically, you will need to prevent the assembly from spinning in order to break loose and remove the spindle nut. Using the 32 mm 12 point deep well socket, remove the spindle nut. You can place a pipe on the end of the ratchet to achieve more leverage to break the nut free. Once, you have broken the nut free and removed it, raise the vehicle back up, secure it and remove the tire. Slowly turn the assembly so that the holes in the front match up with the bolts securing it to the backing plate. You will have to do one bolt at a time and remove all four bolts. There is no need to remove or do anything to the emergency brake. Once all four bolts are removed, locate the divet on the end of the spindle. Center the rounded end of the ball peen hammer against the divet and using a heavy hammer, give it a few good hard whacks. You will definitely need a hammer with some weight, I used a 3 lb steel mallet. Do not simply use a hammer to hit the spindle directly. Using the round end of the hammer against the divet distributes the strikes evenly down the spindle. You will risk damaging the threading if you start beating at it with a hammer directly. You will start to see the assembly move forward about an inch or two. One of two things will happen here. Either the assembly will break free of the backing plate, which you will simply need to hit it up, down, left and right to slowly knock it loose and out. Or as in my case, the backing plate will separate from from the axle. You are almost there! Remove the backing plate from the spindle and prop one side of it against the ledge of the axle. Hold the other side of the plate with your hand. As long as you have the one end against the ledge of the axle, holding it with your hand will be more the enough to brace it. When I tried to prop the other side of the plate against my tire, it started to slightly bent the backing plate. Give the edges of the bearing a few good whacks with heavy hammer and the assembly will drop to the floor. Now just put everything back together in reverse! Last but not least, don't forget the bend the metal of the spindle nut back down into the groove once you tighten it back down.


 1 point