jlangford
-
Posts
5 -
Joined
-
Last visited
jlangford's Achievements
")


-
Frozen Touch Screen On Is 250. Help!
jlangford replied to Tbanks39's topic in 07 - 13 Lexus IS250 / IS350 / IS-F
That's good they partially owned up to the problem for you. Here's a link to the post with the fix, http://us.lexusownersclub.com/forums/index.php?showtopic=69937 -
Repaired Navigation Touch Screen
jlangford replied to jlangford's topic in 07 - 13 Lexus IS250 / IS350 / IS-F
I suck at soldering. And I don't have any precision soldering stuff. And I was worried about heat. Trust me I was tempted! Also, when I "found" the live lead I really had to press the probe's needle in between the pieces of glass - and it only made contact in exactly one spot. So I felt like the crack in the conductor was already mostly under the glass. The circuit writer ink is pretty thin, so I hoped it would flow in and work, and it did. -
Hi Jacob, saw your post on fixing the IS touchscreen and it's inspiring. I have the same issue and am about to attempt the fix. One question - why did you choose to use the circuit writer vs. just touching a hot soldering iron over the bad connection to reflow the solder on it ?
Thanks - not sure how to get your response - my email is spaghetti@austin.rr.com
-
Repaired Navigation Touch Screen
jlangford replied to jlangford's topic in 07 - 13 Lexus IS250 / IS350 / IS-F
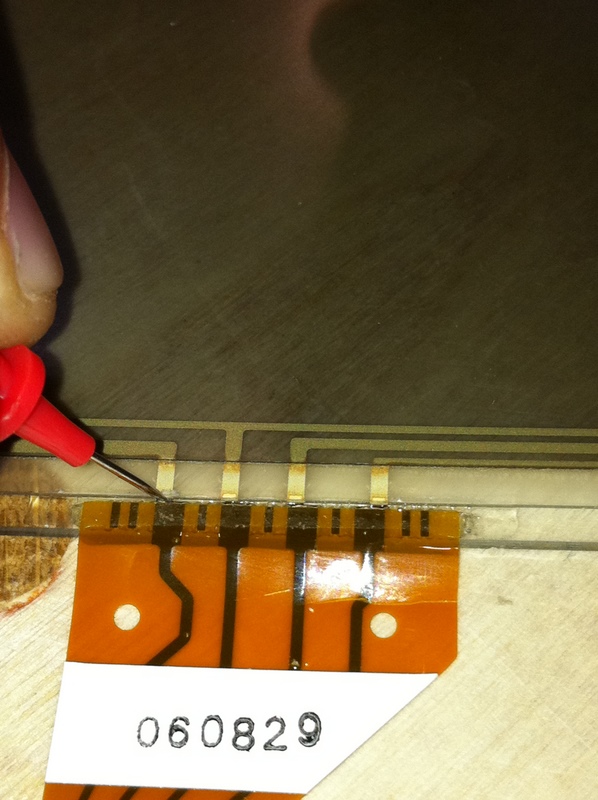
picture of the major culprit attached, more detailed photos available at this link https://picasaweb.google.com/jacob.langford/LexusIS250NavscreenRepair#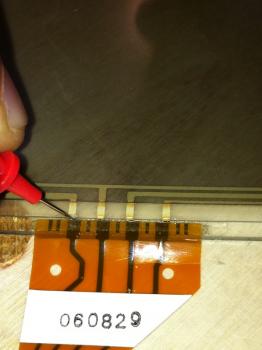
-
Frozen Touch Screen On Is 250. Help!
jlangford replied to Tbanks39's topic in 07 - 13 Lexus IS250 / IS350 / IS-F
I just posted a fix for this on the forum. Did you get it fixed too? If so how? -
Last Monday my wife told me the touch screen in her '07 IS-250 didn't respond to touch. Indeed, no touches registered at all, though the screen displayed everything. Which brought me to these forums, and horror stories of $6500 new parts, $2000 rebuilt, etc. My love affair with this lemon has long ended - one defect after another, recalls for so many things, too much time in the dealership. But I digress... If your Lexus has the same manufacturing defect as mine, and you're patient/mechanically inclined, you may be able to fix it for CHEAP. As in under $50 cheap. The culprit for this problem was a faulty connector on the touch panel. The touch panel is a 4-wire resistive panel, taped to the LCD display. The unit is made by Toshiba. There's a four wire ribbon cable that is improperly bonded to the touch panel. Sunday had been a hot day here, and upon further mental digging, my wife recalled hitting a pothole a few days before. Shock + thermal-expansion + manufacturing defect = dead nav unit = unreasonably costly expense with normal consumer operation. In my opinion Lexus should really fix this... So the basic procedure is to remove the nav unit from the car. There are picture on the web on how to do this. The hardest part is getting the A/C vents out of the dash - when I did it I ended up removing the outer trim first, but after getting it all out I could see that the whole thing should slide out in one piece. I have some detailed photos of the clips if anyone wants them. And if you're partway mechanically inclined you can pull the unit out and a guy on ebay offers a repair service for under $600. Your car will drive with the unit out, but you have no radio, no nav, the seat airconditioning is on max, and the cabin AC is set to wherever you last left it. And the dash is lit up with pretty much every warning. Anyhow once the nav unit is out, the outer trim for the radio, navscreen, etc all comes unclipped and slides off as one unit. To do this, remove 8 screws, undo the clips, and just pull. It required a bit of force on the right side where the cables come out, but the clips were the same on both sides - nothing hidden here. Once this is off you will see the screen unit is held in place with 4 screws. There's also a ribbon connector and a power cable that need undone. Be careful with these delicate ribbon connectors... Once the display unit is out, there are again four screws that hold the housing together. It's easy to get apart, but pay attention to the copper clips and take some photos so you remember how it goes back together. Unhook the 4-wire ribbon connector and you're ready to troubleshoot. Labor at this point should be under an hour if things have gone smoothly, but realistically two hours. Here's where you need a good set of test probes for your multimeter - I found a set that worked perfectly at Radio Shack for about $20 - including lots of cool micro probes, clips, needles, etc. I couldn't have made the repair without these. Also, while there, pick up a silver CircuitWriter pen for about $11. That's what I used to repair the trace. The resistance between pins 1 and 3, and 2 and 4 should be about 500 and 1700 ohms. The resistance between the other pairs of pins, say 1/2 or 1/4, or 3/4 should be infinite until the panel is touched. When touched the resistance between those should go to something under 2k ohms. From this info you can figure out which connector is faulty. In my case the connector failed right where the two pieces of glass are sandwiched together, and by using the needle probe, I was able to get a good resistance measurement on the touch panel by wedging the needle of the probe up into the crack where the two pieces of glass join. I found a bit of live connector. So then I took a razor blade and scratched off the coating on the ribbon connector, right up to the glass, and applied some of the CircuitWriter ink there. Note that it has to dry before it's conductive. When it does dry, the panel is repaired. Seal that back up, put it together, and everything's done. When I did this, I actually used a razor blade to completely separate the touch panel from the display, and in so doing sliced part of the ribbon connector. You can't use the CircuitWriter pen to fix that, because it has no strength. So I had to buy a $35 tube of silver conductive epoxy, and was able to repair it. This may have been better all around, but the epoxy isn't runny like the circuit writer ink, and it might have helped get under the glass panel being runny. When I put the unit all back together (probably about two hours, being cautious, using the right screws, not forgetting any connectors, etc). The unit fired up and worked perfectly. All the warning lights on the dash were gone, and I only needed to reset the radio stations. Financial disaster averted! I'll post some pictures of this if anyone's interested.